Last week I picked up an EMAX TinyHawk S micro quadcopter. I’ve had time to have a quick play around with it, and I thought I’d write down my thoughts here.
I’m mainly writing this because I wanted to document the small fix I had to make to the VTX, but I figured while I was writing things I might as well round it out and do a mini-review. If you’re just here for the modifications, jump to the bottom.
Review
What is it?
The TinyHawk S is a 75mm-sized micro quad with FPV capabilities. It’s built around an F4 flight controller running Betaflight, a FrSky-compatible radio receiver, and a 40-channel 5.8GHz video transmitter. If you already have FPV goggles and a FrSky-compatible transmitter, it’s likely that you can use both with the TinyHawk.
First Impressions
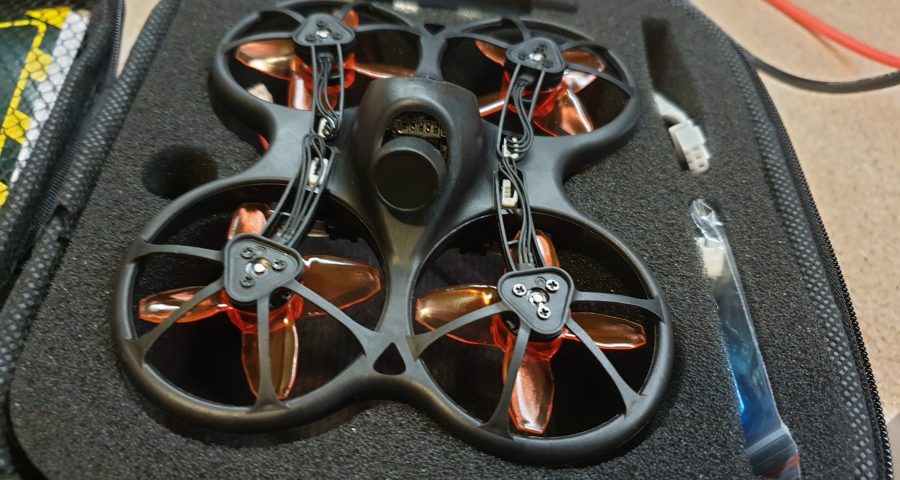
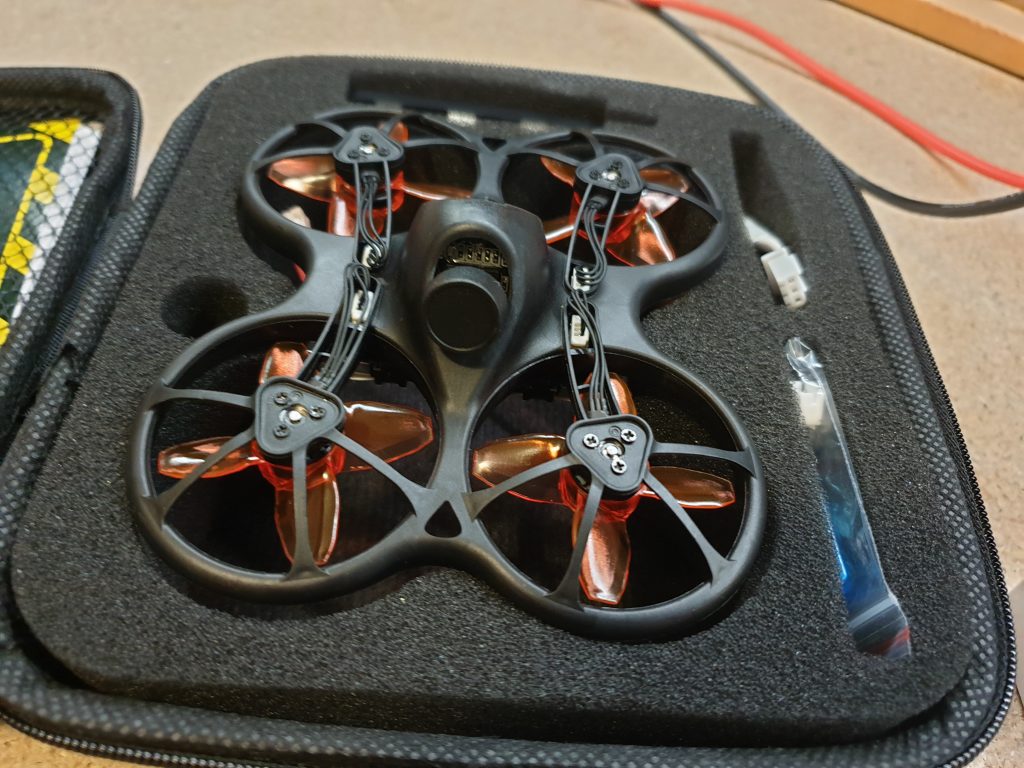
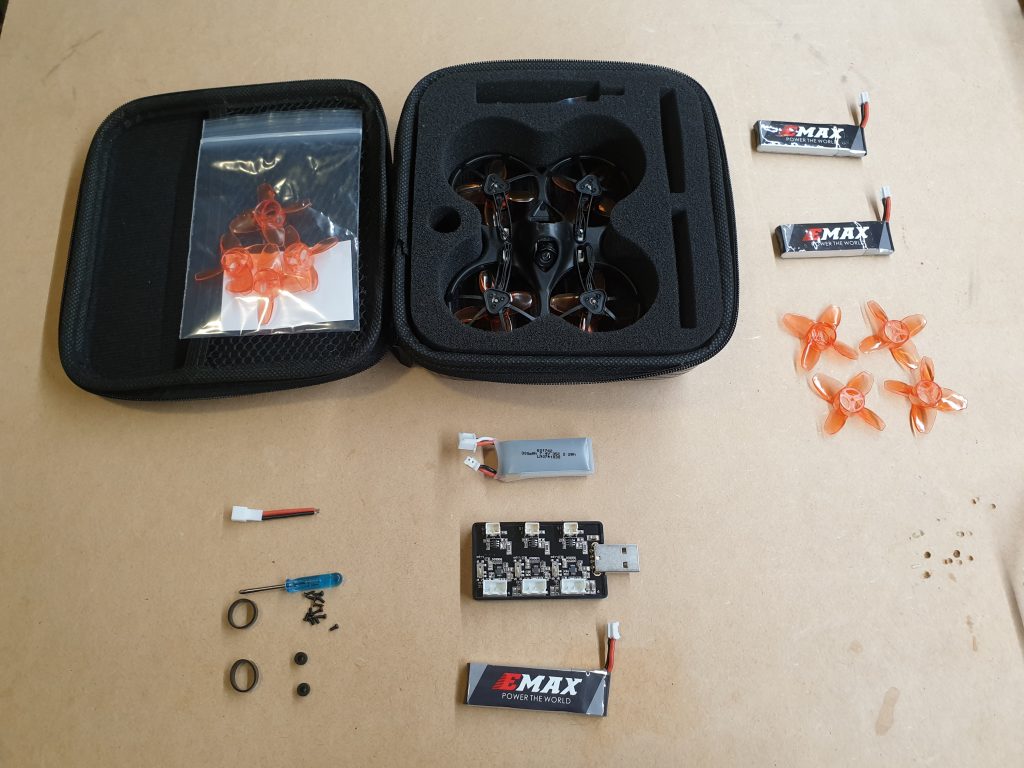
The TinyHawk S comes in a small soft-case with a cut foam insert. Everything fits comfortably, and it feels like a good case to keep/transport the TinyHawk and accessories in.
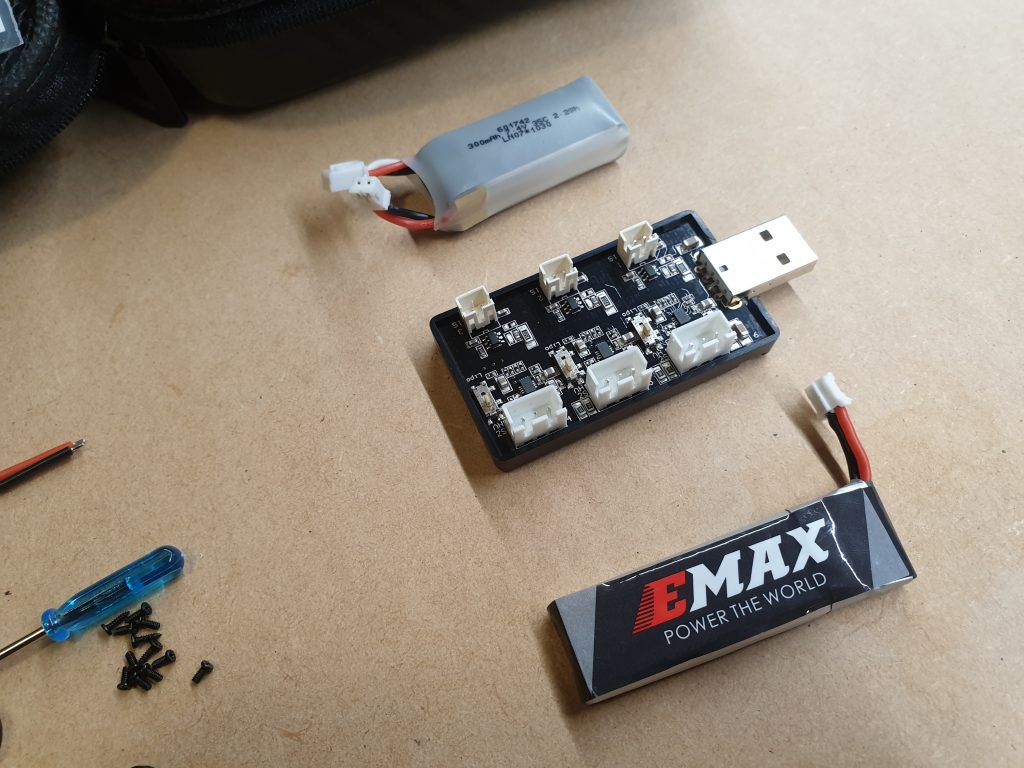
Speaking of accessories, along with the quadcopter itself, you get:
- 1 x 1S 450mAh LiHV battery
- 1 x 2S 300mAh LiHV battery
- 1 x USB LiHV charger (charges up to 3 x 1S, 3 x 2S)
- 1 x Set of Spare Propellers
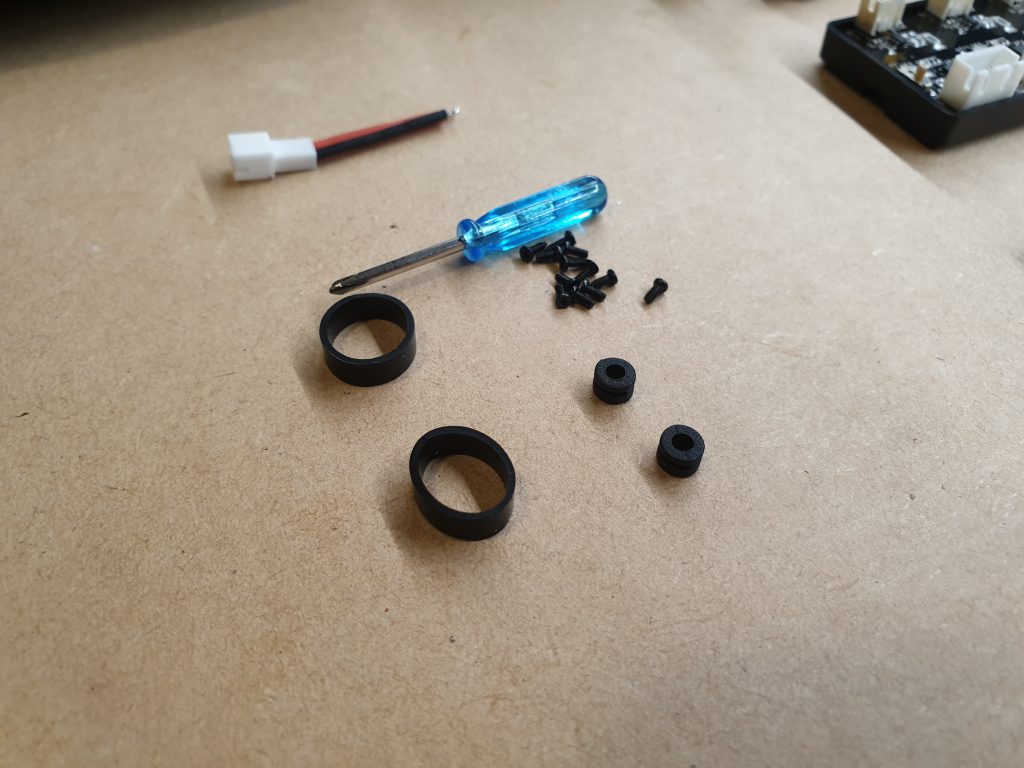
There’s a small bag of spare parts which includes:
- 1 x Screwdriver
- 2 x Spare Anti-Vibration Grommets
- 2 x Elastic Battery Straps
- ~12 x Spare Screws
- 1 x Battery Connector (to replace the one on the TinyHawk if it is damaged)
I also picked up an extra set of spare propellers, along with two spare 1S batteries.
There’s enough spare room in the soft case to fit the extra batteries and propellers. You could probably fit a dozen spare batteries in the case if you wanted to (and you might want to).
Performance
Flight performance seems to be quite good. There’s enough power to get moving quickly when you want to, and the rather slim and solid frame makes for good manoeuvrability in tight spaces. It’s definitely a lot punchier with the 2S battery, and can handle moderate winds quite well – just make sure to change the PID profile when changing battery types (easily doable via the Betaflight OSD menu).
Betaflight’s Turtle / flip-over mode is very handy with this quad – make sure you map this mode on your transmitter. I’ve certainly found myself using it to recover from a crash more than a few times…
The camera quality is decent. In standard lighting conditions I would say it is quite good, especially considering the absolutely tiny size of the camera.
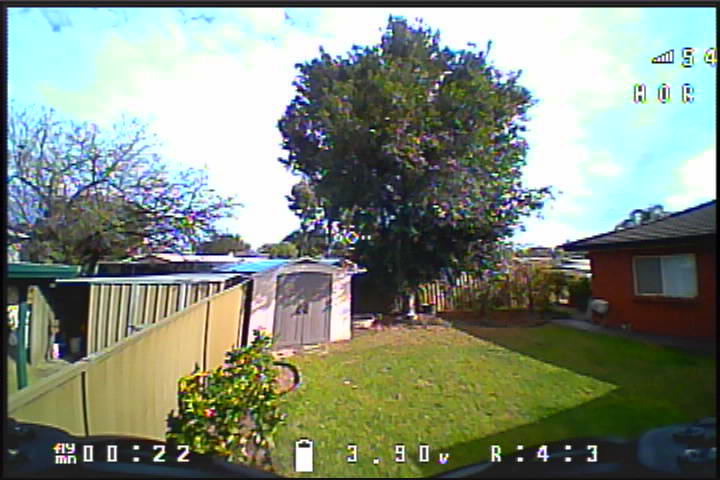
Dynamic range on the camera doesn’t seem to be great – at least, not compared to what you’d see on FPV cameras marketed as WDR / HDR. This can make it hard to discern the darker parts of the image at times.

I’m unfairly comparing the camera to much larger ones used on full-size FPV quadcopters – it’s probably tough to beat this camera in the package size we’re talking about here. Still, it would be interesting to see if there are any easy options for upgrading the camera.
The battery life is shorter than I’d like – perhaps it’s just my flying, but it seems like 3-4 minutes is the average flight time I get. Still, it’s comparable to any other FPV quad in this size, and there’s not a lot that can be done there. I grabbed an extra two 1S batteries, on top of the 1S and 2S that came in the kit – in total that seems to last me roughly 20 minutes of flight, and then it takes an hour to get them all charged back up.
Closing Thoughts
The TinyHawk feels like a very solid micro quad. I’ve banged it about and crashed it a fair bit, and so far nothing has been damaged or broken. I knocked the camera loose once, but that just popped back into place. I bought a spare set of propellers, but haven’t had to change one yet (and the TinyHawk comes with one extra set anyway). Physically, I think it’s a good design.
The unsoldered VTX pin (see modifications) caused me a bit of trouble. I don’t know if this was a one-off fault, or if it’s more common than that – anyway, it was definitely flyable as it was, but it made recovering from bumps and impacts harder.
I’d suggest picking up more batteries – I don’t think the two extra I bought are enough, and I’ll probably grab another three or four sometime soon. I’ve mostly flown it indoors, and the 1S batteries seem ideal there. If you’re using it more outdoors you’d probably want the 2S batteries for the extra punch they give you. In any case, you’ll want more batteries than the two that come in the box.
Of course, any review would be incomplete without a self-serving affiliate link, so…
TinyHawk S on Banggood (Affiliate Link)
Modifications & Fixes
Short Video Loss on Bumps / Crashes
When I first started flying the TinyHawk, I noticed that the video would sometimes momentarily drop out when bumping into things. This usually resulted in my FPV goggles going to a blue screen for a fraction of a second (maybe up to a half a second in the worst case).
At first I just thought this was the effect of the vibration on the transmitter electronics. However, I noticed it was happening even with gentler impacts that I didn’t think should cause an effect like this. I decided to open up the TinyHawk and take a look around, and found that the pin that supplies 3.3V power to the video transmitter (VTX) had not been soldered – it was making physical contact with the pads on the PCB, but it’s likely that during bumps and crashes the pin was momentarily losing contact around causing the VTX to lose power and reset.
I soldered this pin and took the TinyHawk out for another fly – and hey, the video drop-outs seem to be gone. If you’re seeing similar issues, I’d suggest checking this same thing. Here’s a quick guide on what to do:
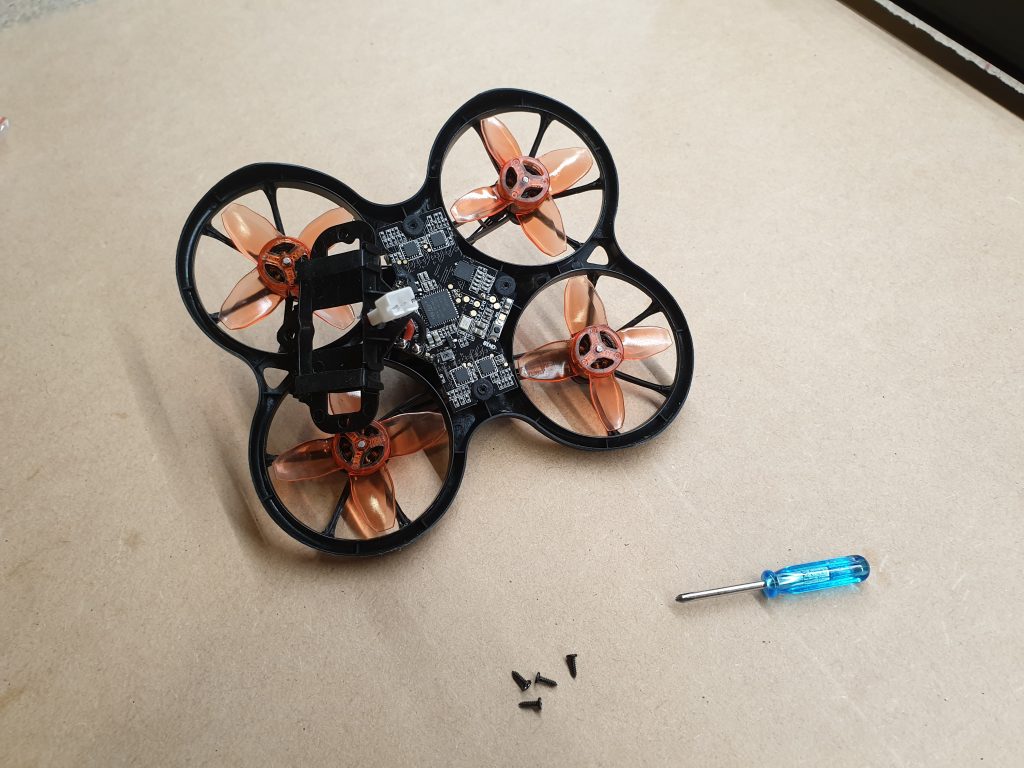
First, you need to open up the TinyHawk to get access to the VTX. Start by unscrewing the four screws on the underside to remove the plastic casing.
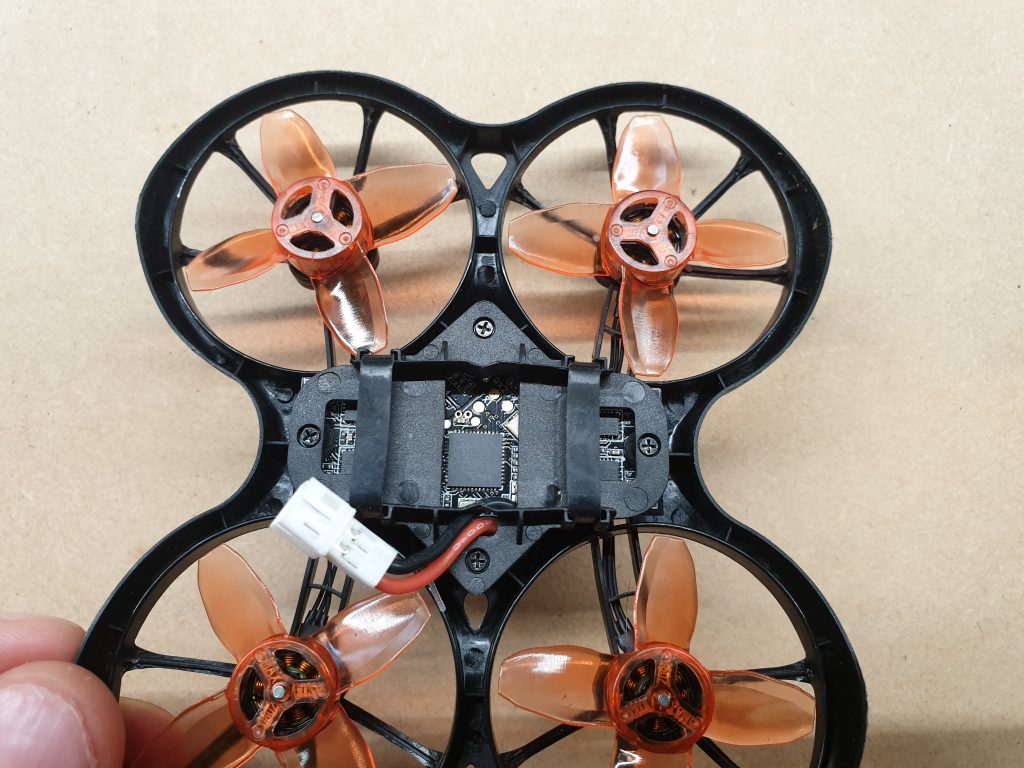
With the screws gone, the main PCB is only held in place by the four anti-vibration rubber mounts. Pull the PCB directly away from the TinyHawk, and the rubber mounts should slide off of the plastic pins that they’re mounted on. Once the mounts are free, you’ll need to disconnect the four motor cables and the camera cable that are connected to the PCB. These should pull out with minimal force.
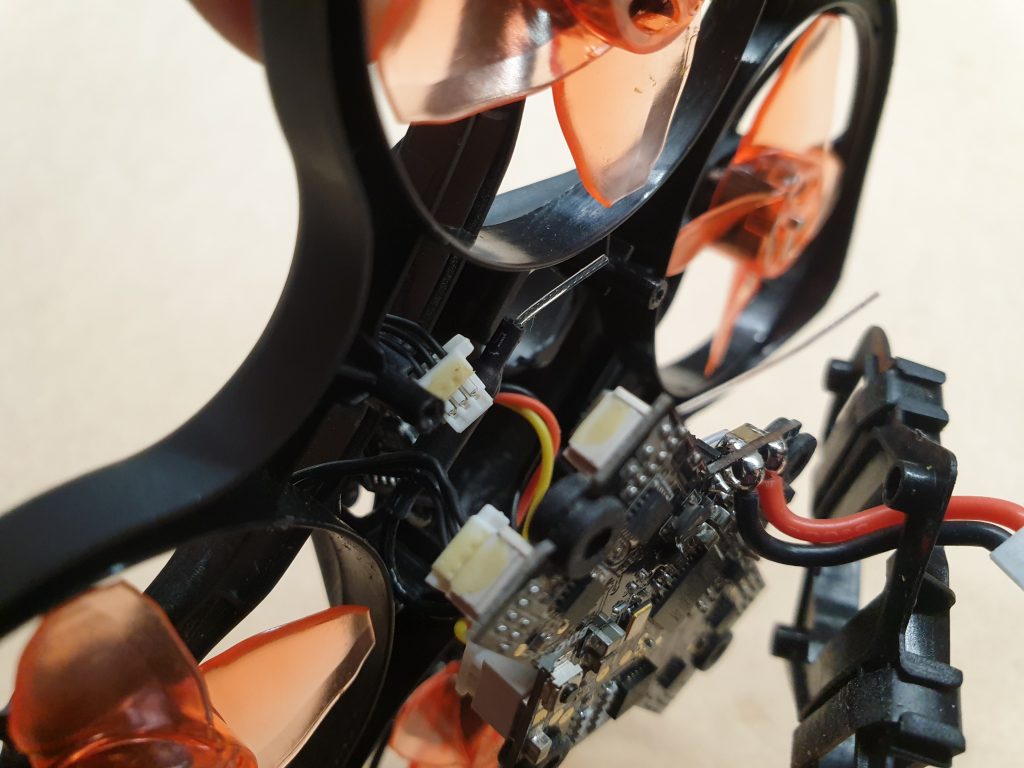
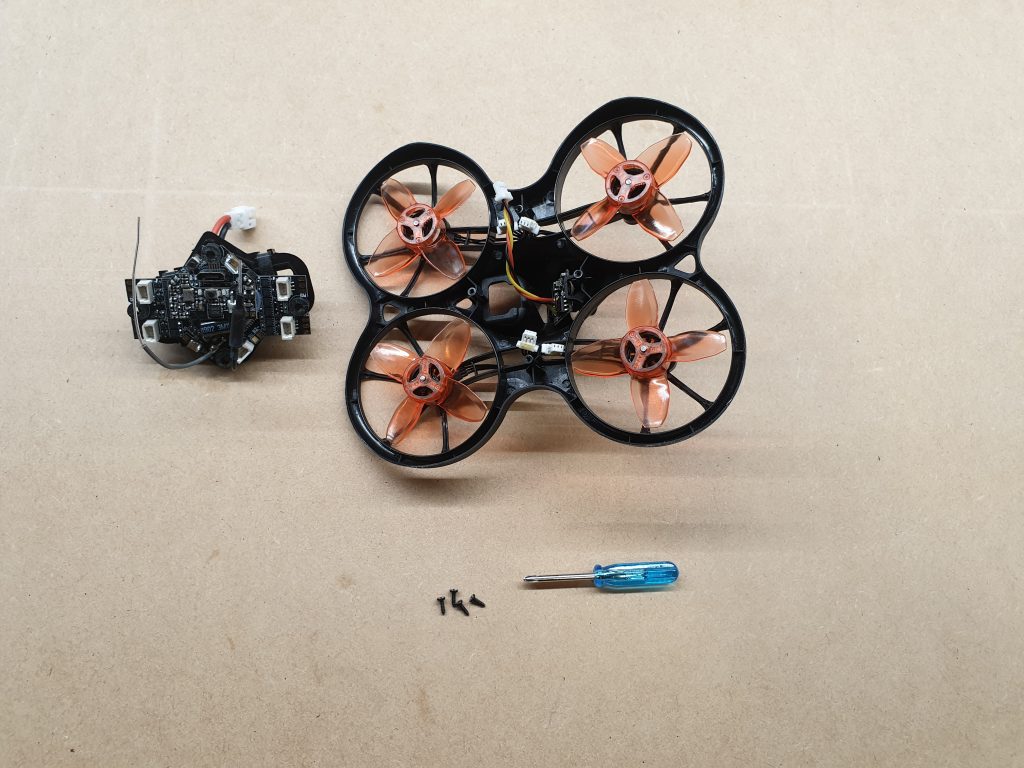
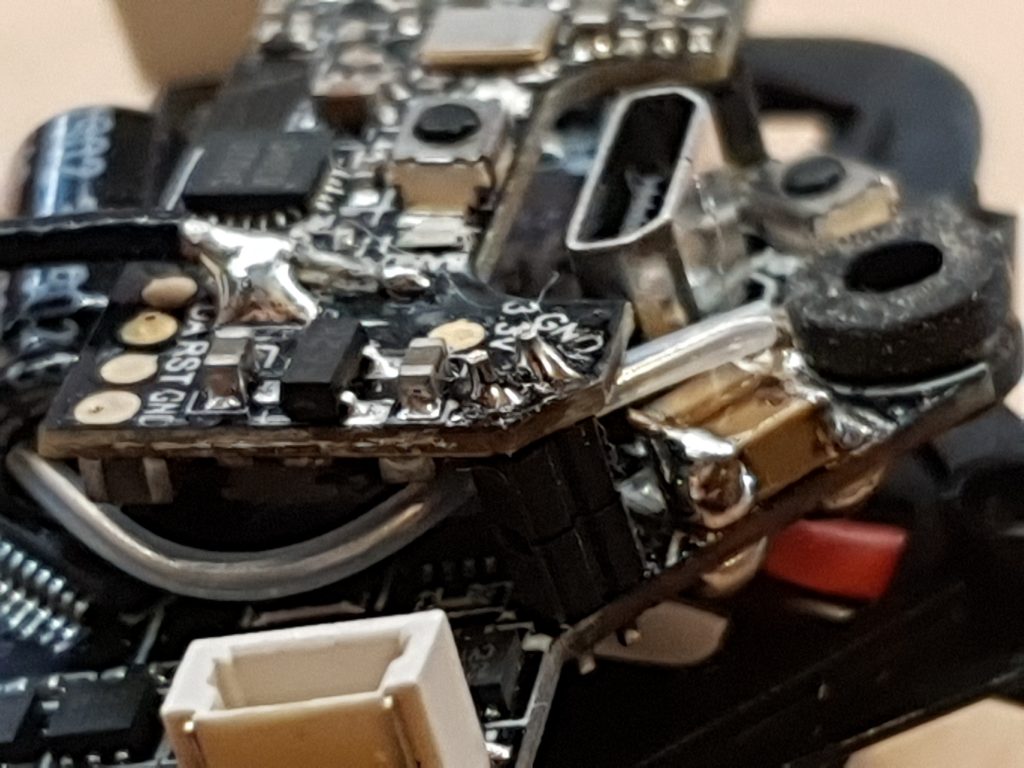
With that done, the main PCB, with the VTX mounted on top of it, should be free from the body of the TinyHawk.
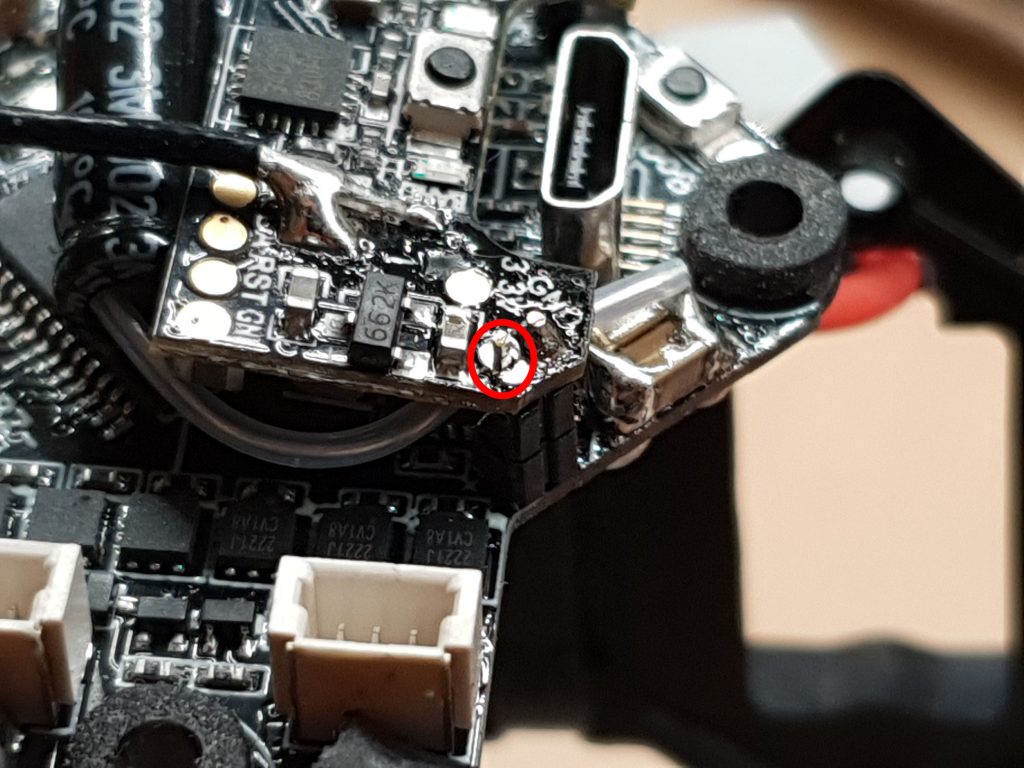
The VTX is the smaller PCB that sits on top of the main flight controller PCB. It is connected to the main PCB by four pins, split into two groups of two on opposite ends of the board. Two of the pins are marked 3.3V and GND, and are used to supply the power to the VTX. The other two pins are unmarked, but are probably the SmartAudio control signal and another GND.
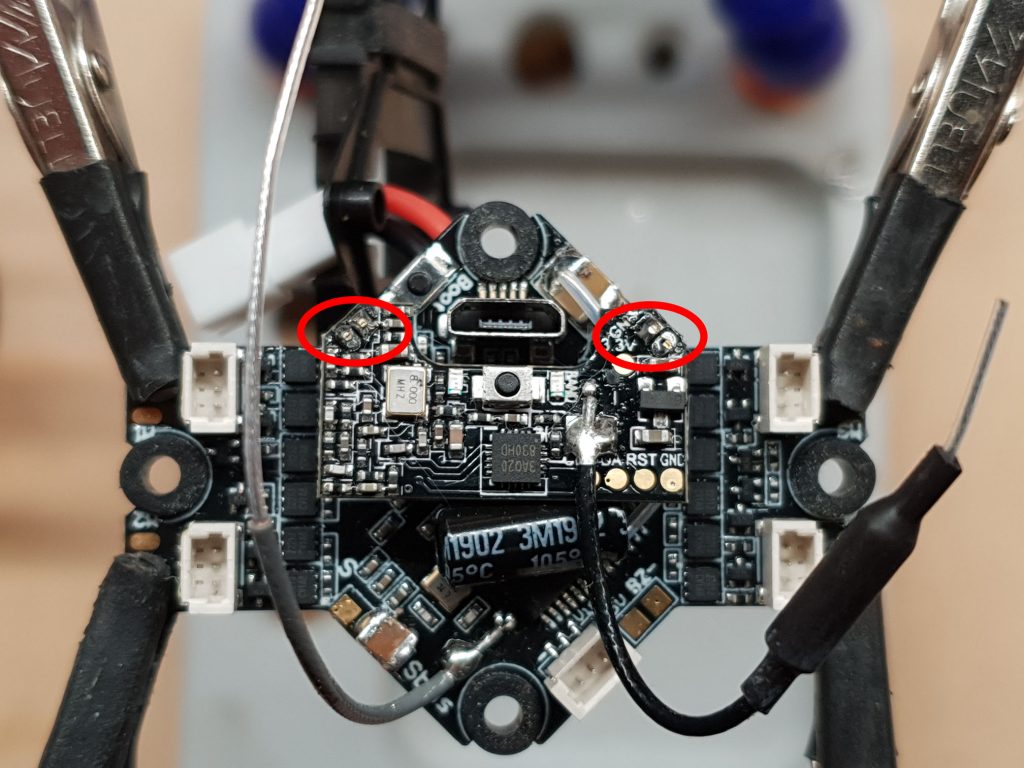
In my TinyHawk, the 3.3V pin was present but did not appear to have been soldered.
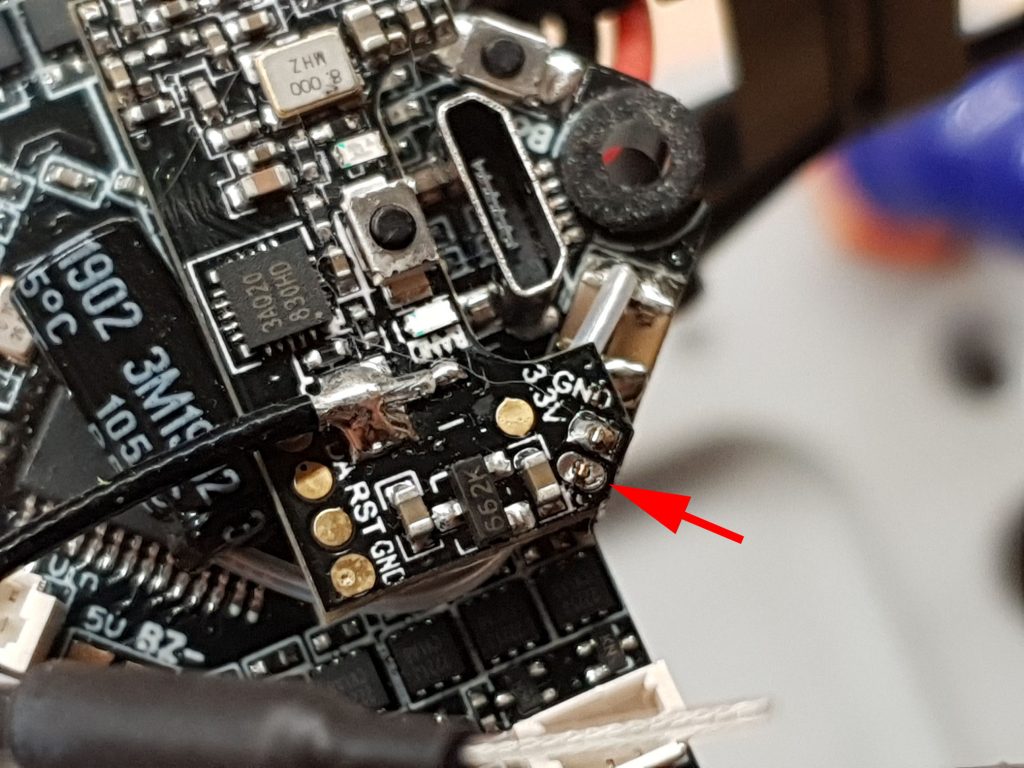
A quick touch-up with a soldering iron should be enough to secure the pin.
Adding a Capacitor to the 5V Rail
While I had the TinyHawk open, I decided to add a bit of extra capacitance to the 5V rail. Reading around online, it seems that adding capacitance to the 5V and 3.3V rails can help reduce video and radio drop-outs that can occur when the battery voltage is low. Many have reported that the currently shipping TinyHawks now come with an extra cap on the 3.3V rail, and this was the case on my TinyHawk too. However, some users have reported that they’re still seeing benefits adding capacitance to the 5V rail, and there shouldn’t be any harm in doing so.
There’s a pair of pads for 5V and GND on the top of the main PCB that are ideally spaced for adding a ceramic capacitor. I had a pack of 22uF 16V 1210 capacitors on hand (Digi-Key part 1276-3395-1-ND), so I installed one of those.
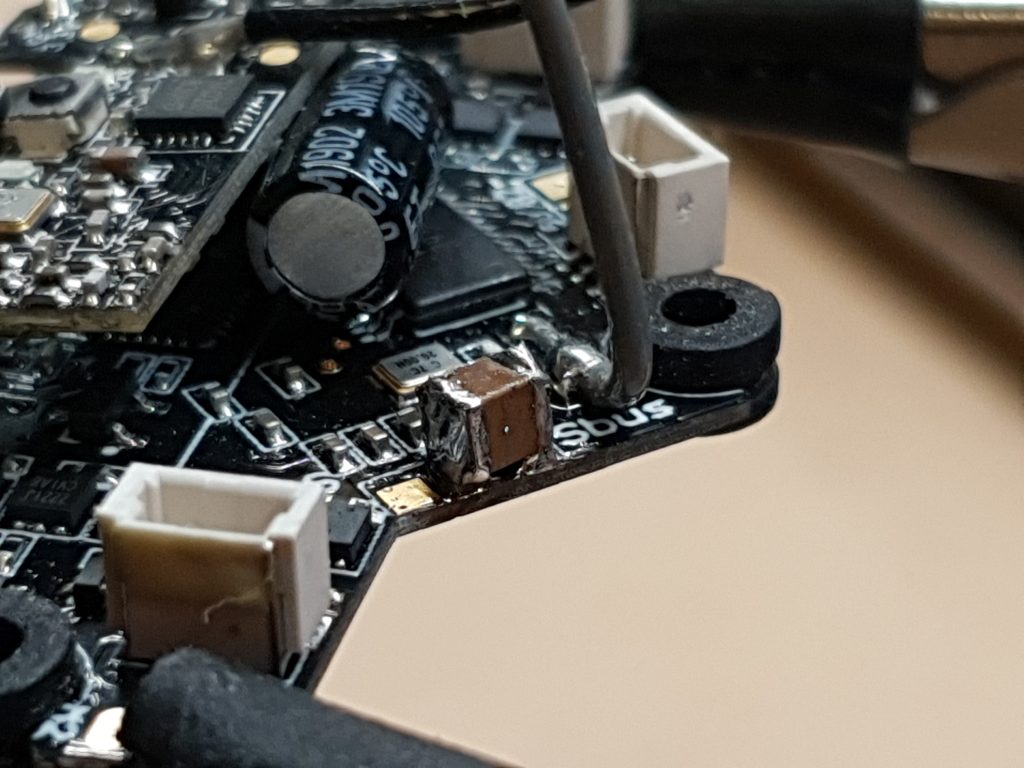
The 1210-sized capacitor was a little tricky to fit, as it almost completely covered the two pads – so if you were buying a capacitor specifically for this job I’d recommend something in a smaller package size (0805 would probably be ideal). Anything 4.7uF and up should do a good job, and I’d recommend a part rated for 10V or more. Type X5R (max temp 85°C) or X7R (max temp 125°C ) should both be a good fit for this application. Here are a few different options:
- 10uF 10V X7R 0805 (Element14 Digi–Key)
- 22uF 16V X5R 0805 (Digi-Key)
- 47uF 10V X5R 0805 (Element14 Digi-Key)
Any of the above should be an easy physical fit, and should provide more than enough extra capacitance.
So, does doing this make a difference? Well, the video feed seems to be a little more consistent when the battery is running low – I don’t think it’s made a huge difference, but there has been a bit of an impact. If you’re in a position where this is an easy mod to do, it’s not a bad idea. It’s not a game changer though – probably because EMAX are already adding the extra capacitor to the 3.3V rail. If you have an older TinyHawk, it could be worth checking.
Wow! I wish I knew what you knew. I’ve been flying for years but have never figured any of this stuff out. Anyway, thanks for everything you said but I have a question really quick, I was taking the motors out and one of the connectors came off the board. Do I solder that back on and if so where does the solder go? Ty
ok so i had the same problem but you shouldn´t soulder it back. rather soulder it to the motor solderpoints on the right i think the 3 yellow ones. sorry for my bad english.