Introduction
I love my 2006 Hyundai Sonata; it’s a great car. It just has one shortcoming – the radio setup is a little dated.
I’d love something more modern – something that could pair with my phone, offer hands-free calling, BT streaming, and do GPS navigation. A reversing camera would be handy too
Of course, all of these are things that can be bought and installed ad-hoc. I could buy a GPS, and mount it to the windshield. I could buy a plug-in handsfree unit, and leave it in the cigarette lighter. I could buy and somehow hook up a BT receiver – there’s no aux input on the radio, but I’m sure there’d be a way. I could get a windscreen-mounted reversing camera, too, I’m sure.
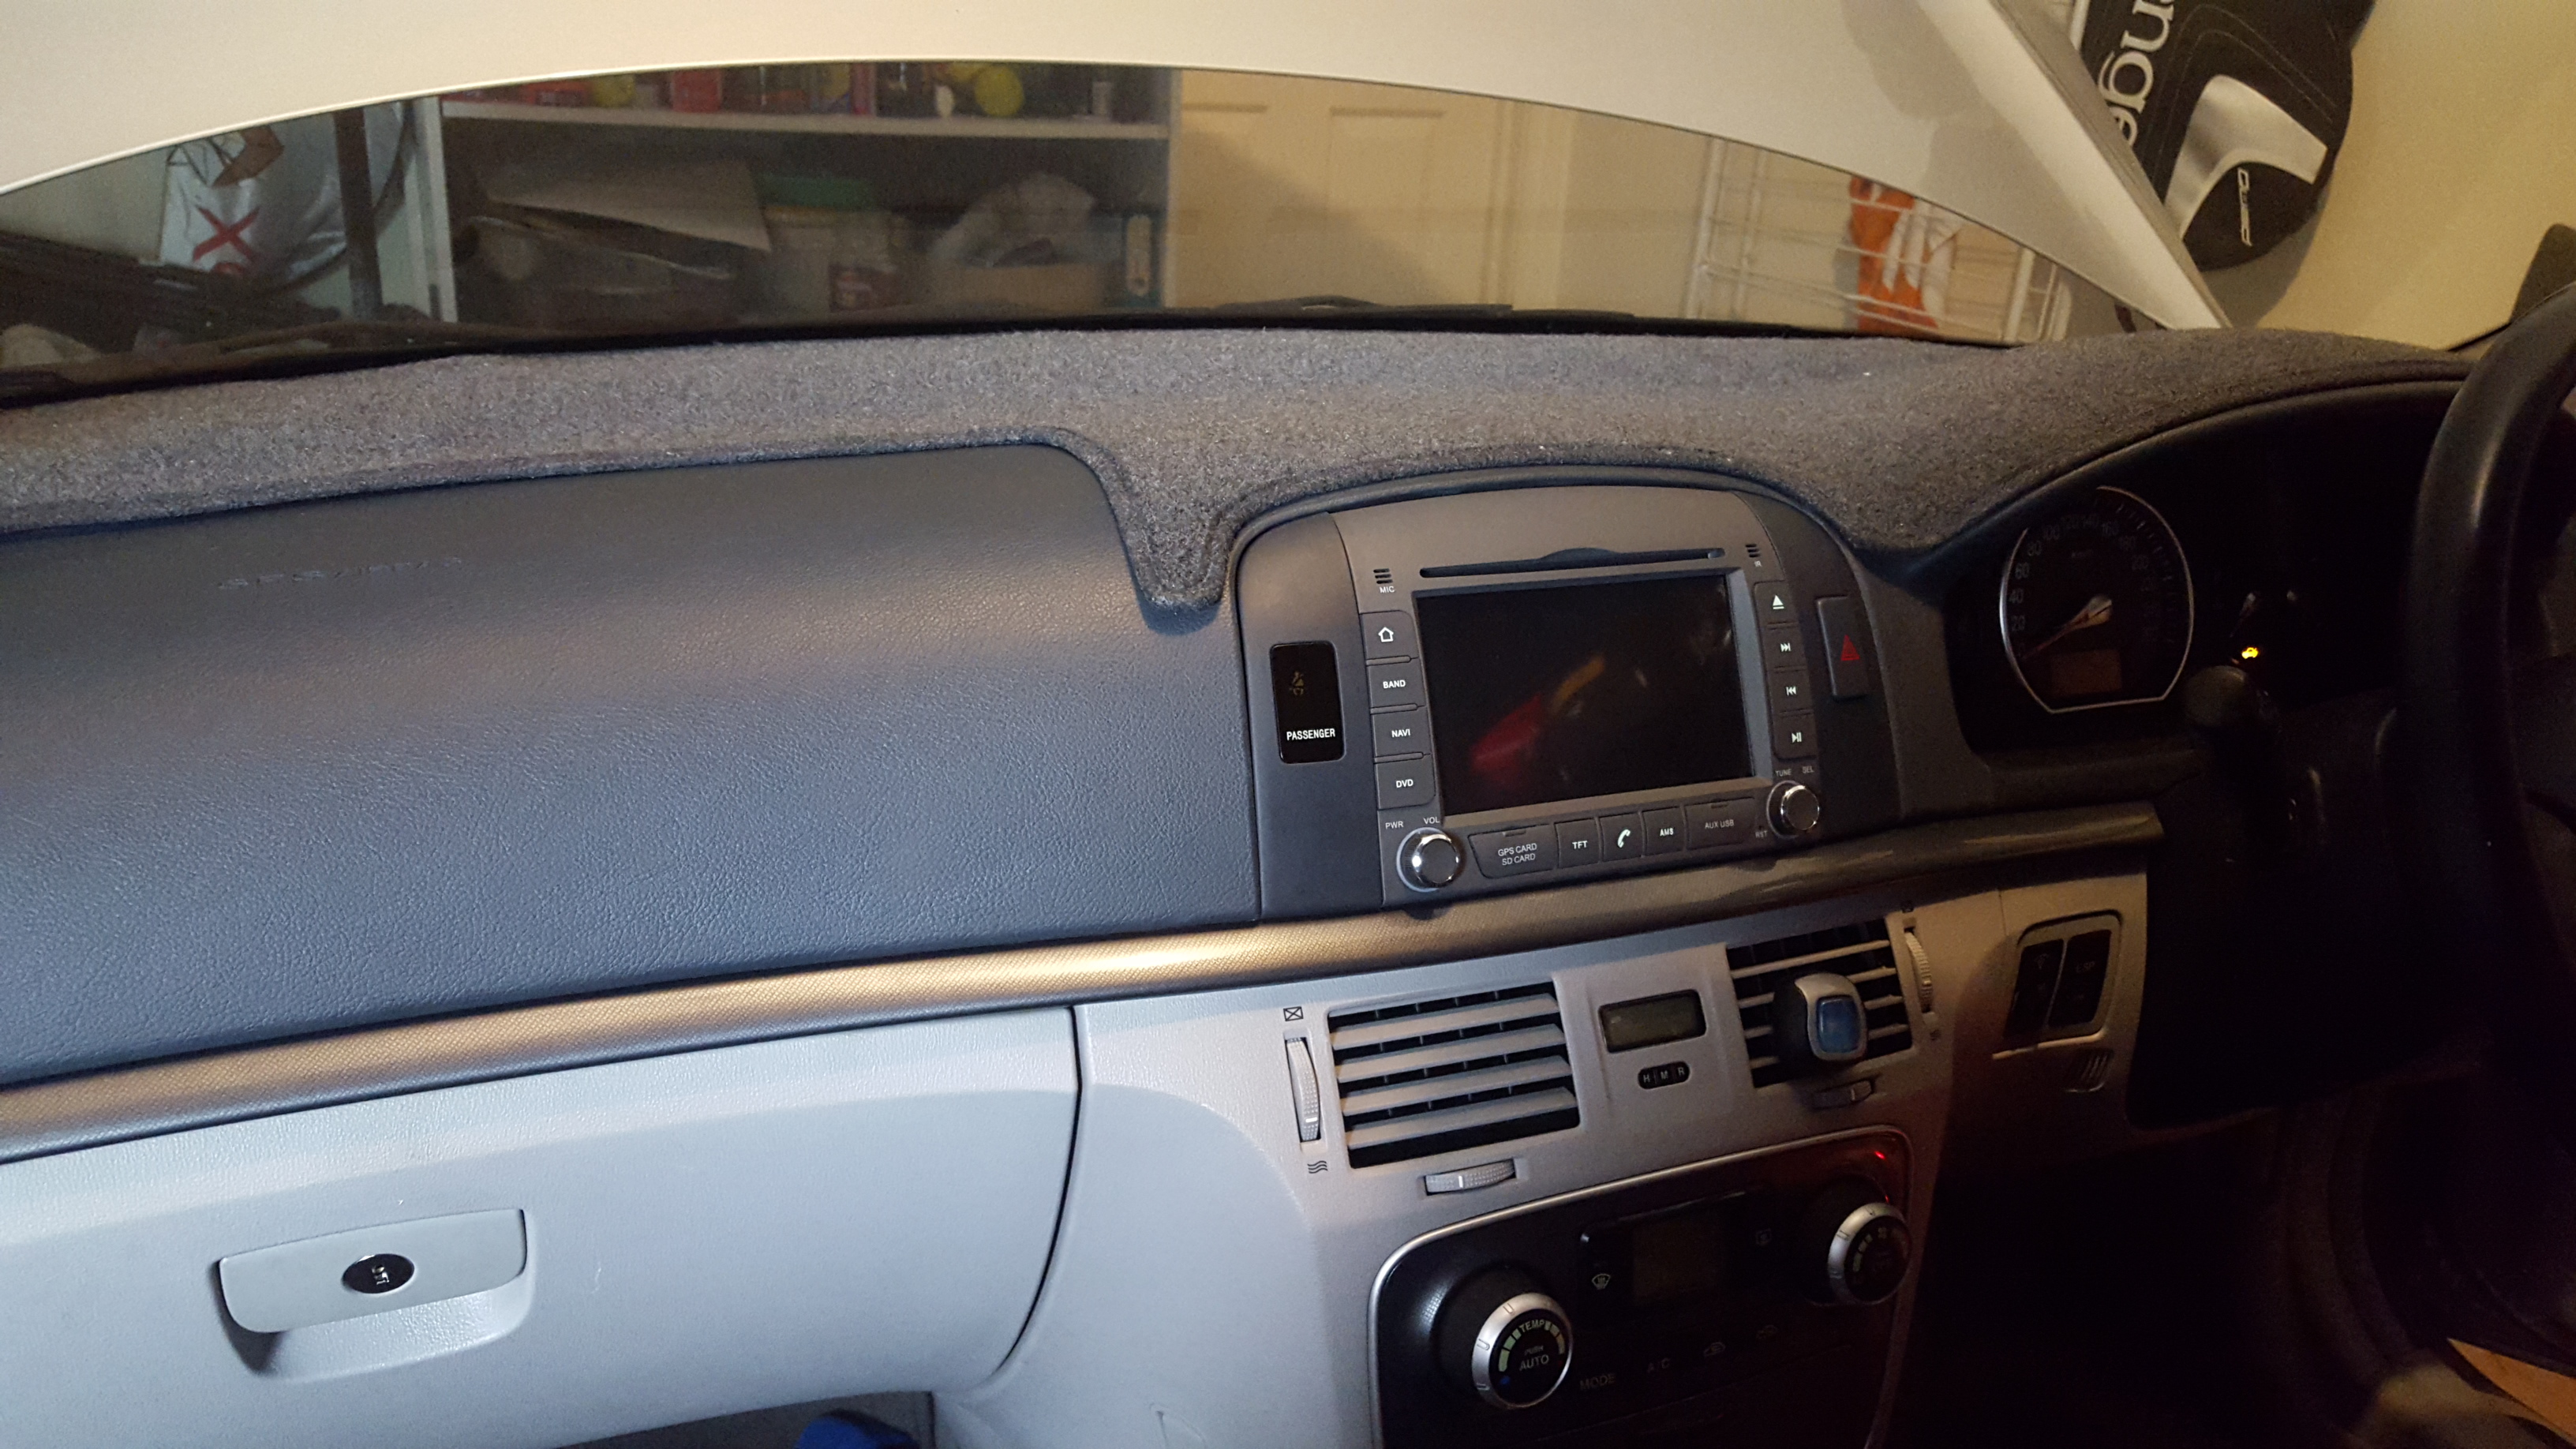
But that wouldn’t be the fun way to go. The fun way – and the cool way, in my opinion – is to fix all those shortcomings in one go. I decided that the best route would be to replace the radio head unit with a modern Android-based one. That could give me all the features I’m after in one bundle. The first problem? The head unit is pretty tightly integrated with the design of the dashboard.
Note the curve of the dash – all of the replacement head units I’d seen advertised were quite square and boxy, and wouldn’t look right at all.
Buying a Head Unit
As it turns out, though, this isn’t an uncommon problem – there are a lot of people who want to upgrade the radio in their car without ruining the integrated look of the manufacturer’s equipment. I eventually came across a seller on Aliexpress that provides Android head units paired with faceplates to match particular vehicle models.
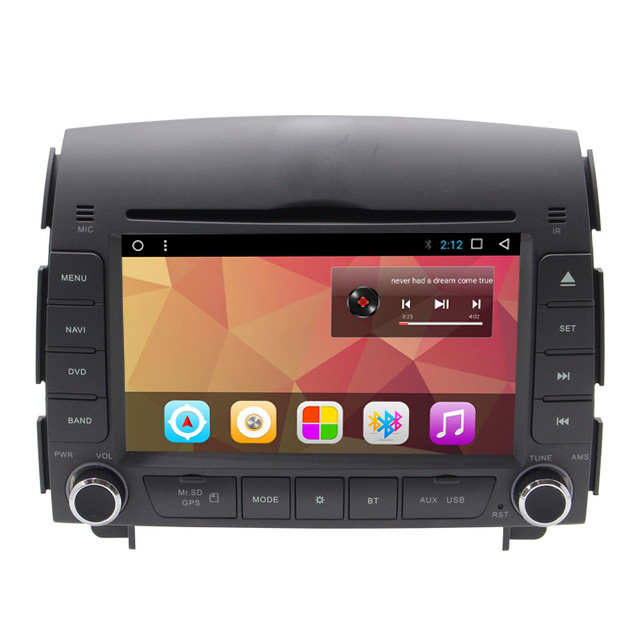
The seller claimed compatibility with my particular model of vehicle, along with models from following years that had the same dash layout. Perfect, I thought – let’s do it!
So, I placed an order for the head unit, along with a suitable reversing camera.
Not long after, I received a message from the seller asking for more details about the car’s current head unit, so they could customise the wiring to suit. Uh oh – not as universal as I thought, but it’s very nice that they customise it for you.
So, I looked through the car’s manual for any information on the radio, found the model number, and sent an image and the model number

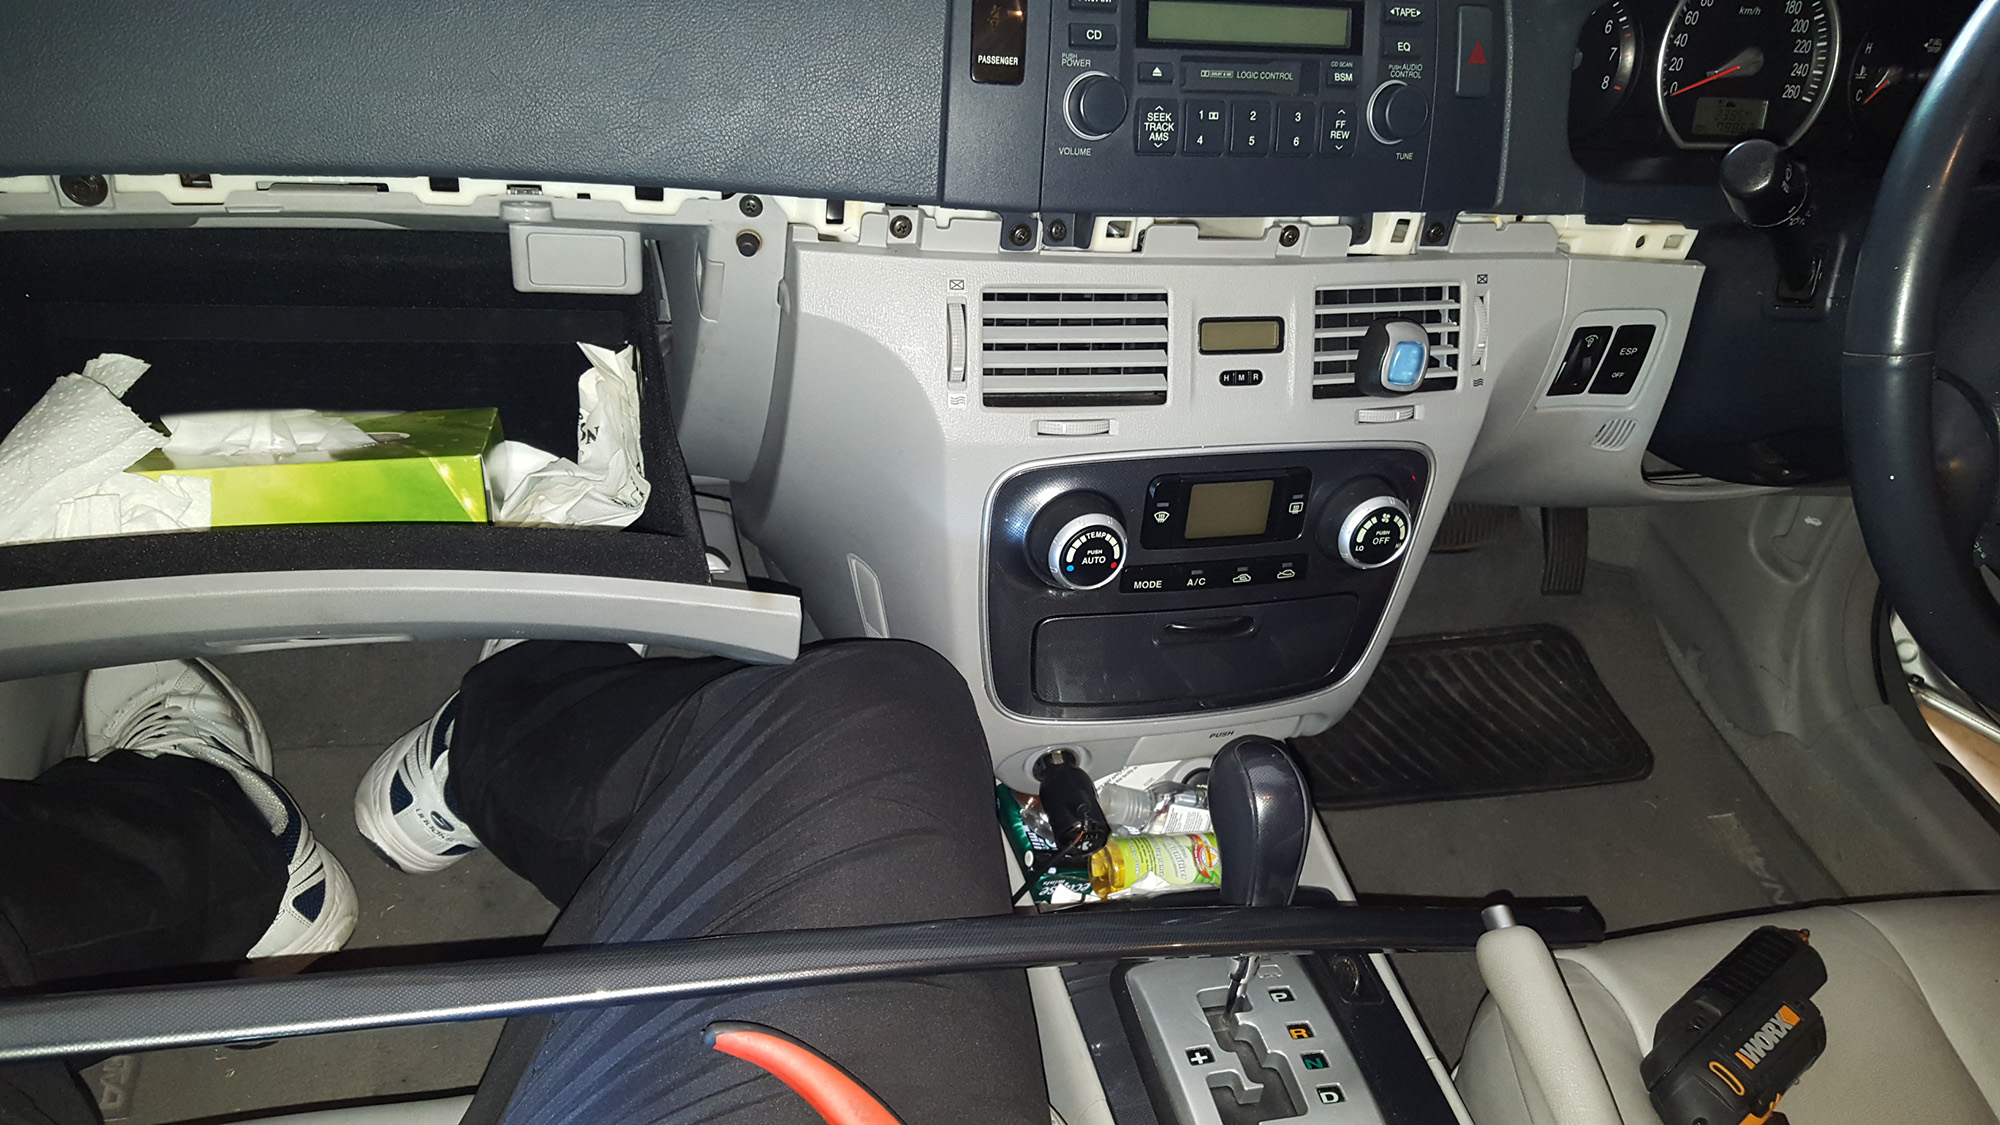
Sadly, that wasn’t the case, and they requested photos of all connectors going into the back of the head unit. Well, that’s a bit of a pain – I wasn’t sure how easy it was going to be to get the head unit out of the car, and I’d probably have to reinstall it while I waited for the new unit to arrive. I figured there was no alternative, so I decided to remove the head unit.
I hadn’t done any work like this before, either in this car or others – so I wasn’t sure how to start. First I checked the owner’s manual for the car, but there wasn’t anything there on removing the head unit. Eventually, I came across the Hyundai Service Information website – which claimed to offer complete service manuals to subscribers. Worth a shot, I thought – naturally, subscription wasn’t free, and the shortest period I could subscribe for was one week at the cost of $20 USD. I decided to give it a go.
Once I was able to log in, I found dozens of documents relating to my particular model Hyundai Sonata. Seeing as I only had access for a week, and didn’t know if I’d ever need any of these documents again, I decided to download them all – it took a little while, but now I have them if I need them. After downloading them, I started trying to figure out what was what – fortunately, there was a conveniently named “radio removal” guide that was able to get me started.
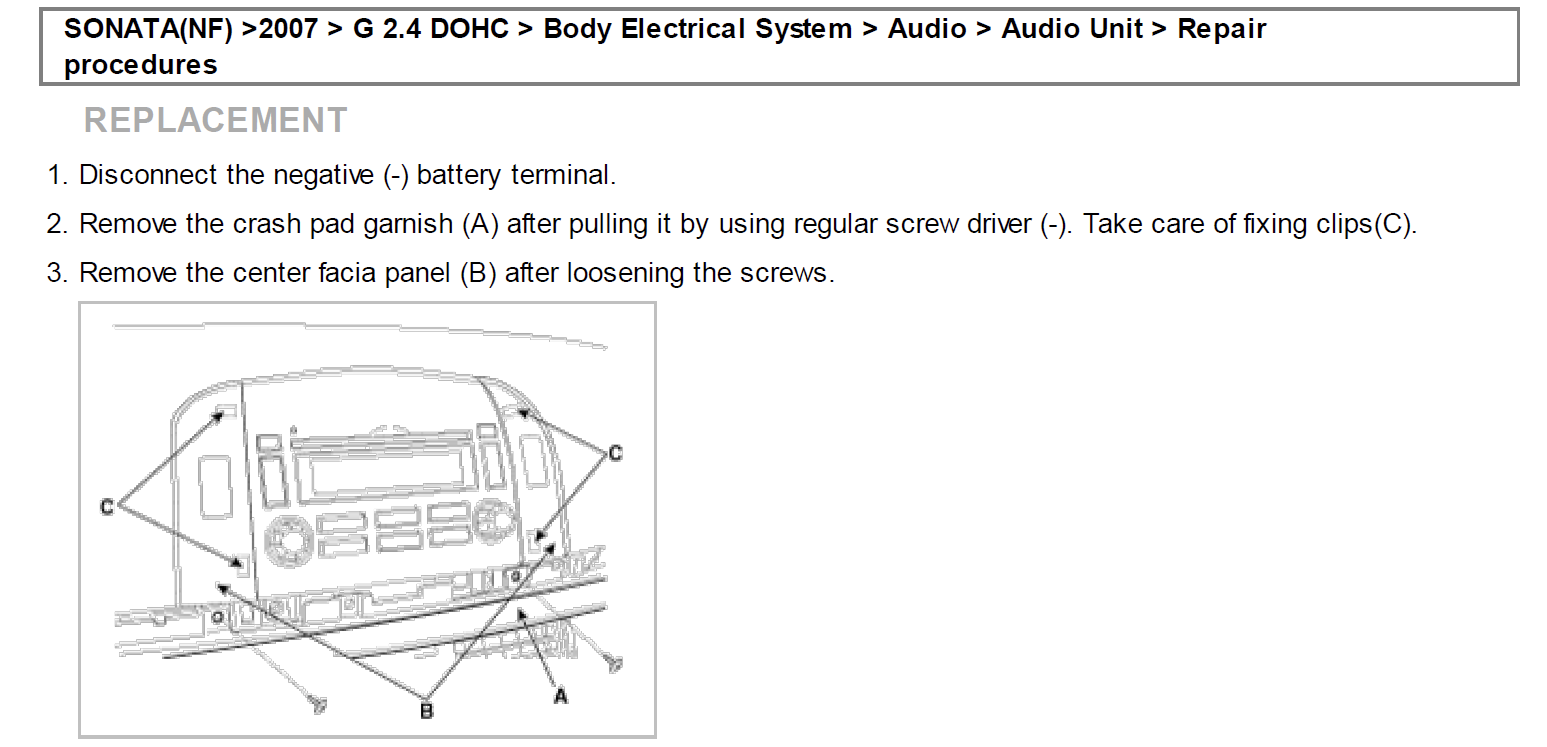
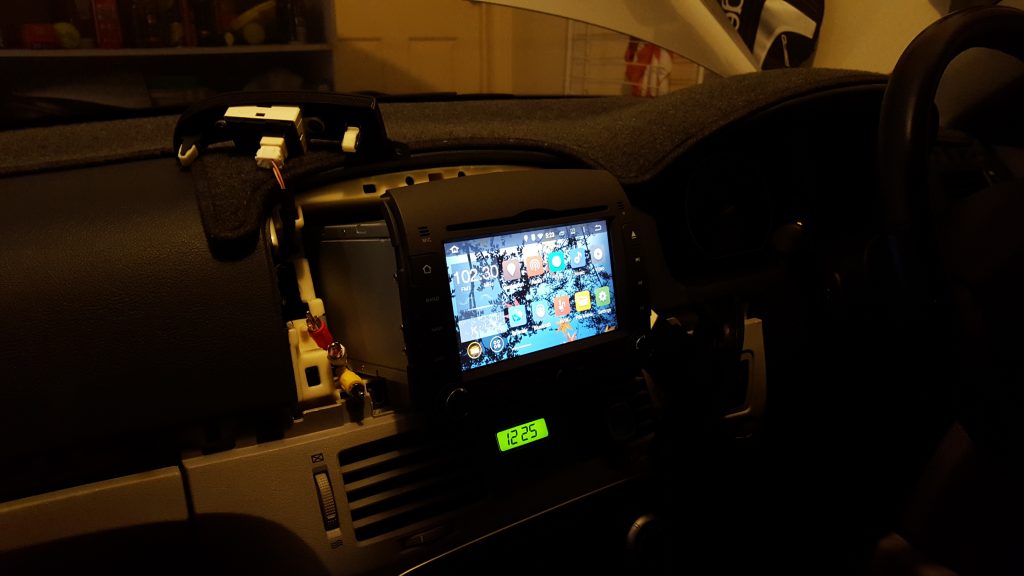
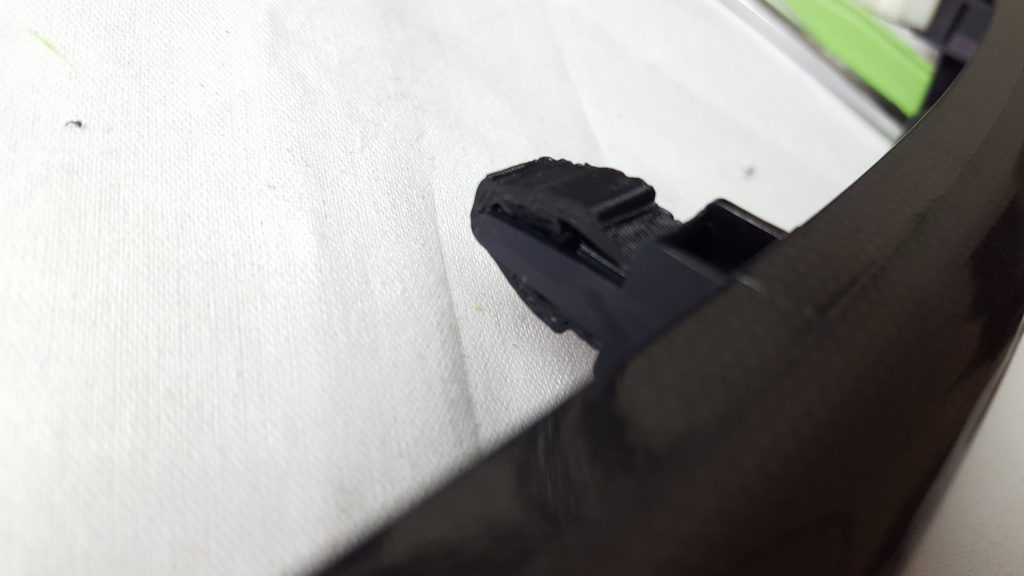
While not a lot of info, the big hint was that I had to remove the “crash pad garnish” that runs the full width of the dashboard before I could get at the screws holding the radio in place. Well, with that in mind, I started removing the “garnish” strip.
Once I knew it just had to pry it away from the dash, it didn’t take too long to remove. Unfortunately, the little clips that held the strip in place often decided to stay embedded in the dash or to fall back inside the car and end up who knows where. I was worried that if I lost too many of them, I wouldn’t be able to reinstall the strip – which not be a big boon for the car’s look. I managed to hold onto most of them, but was a little worried about reinstalling the strip later.
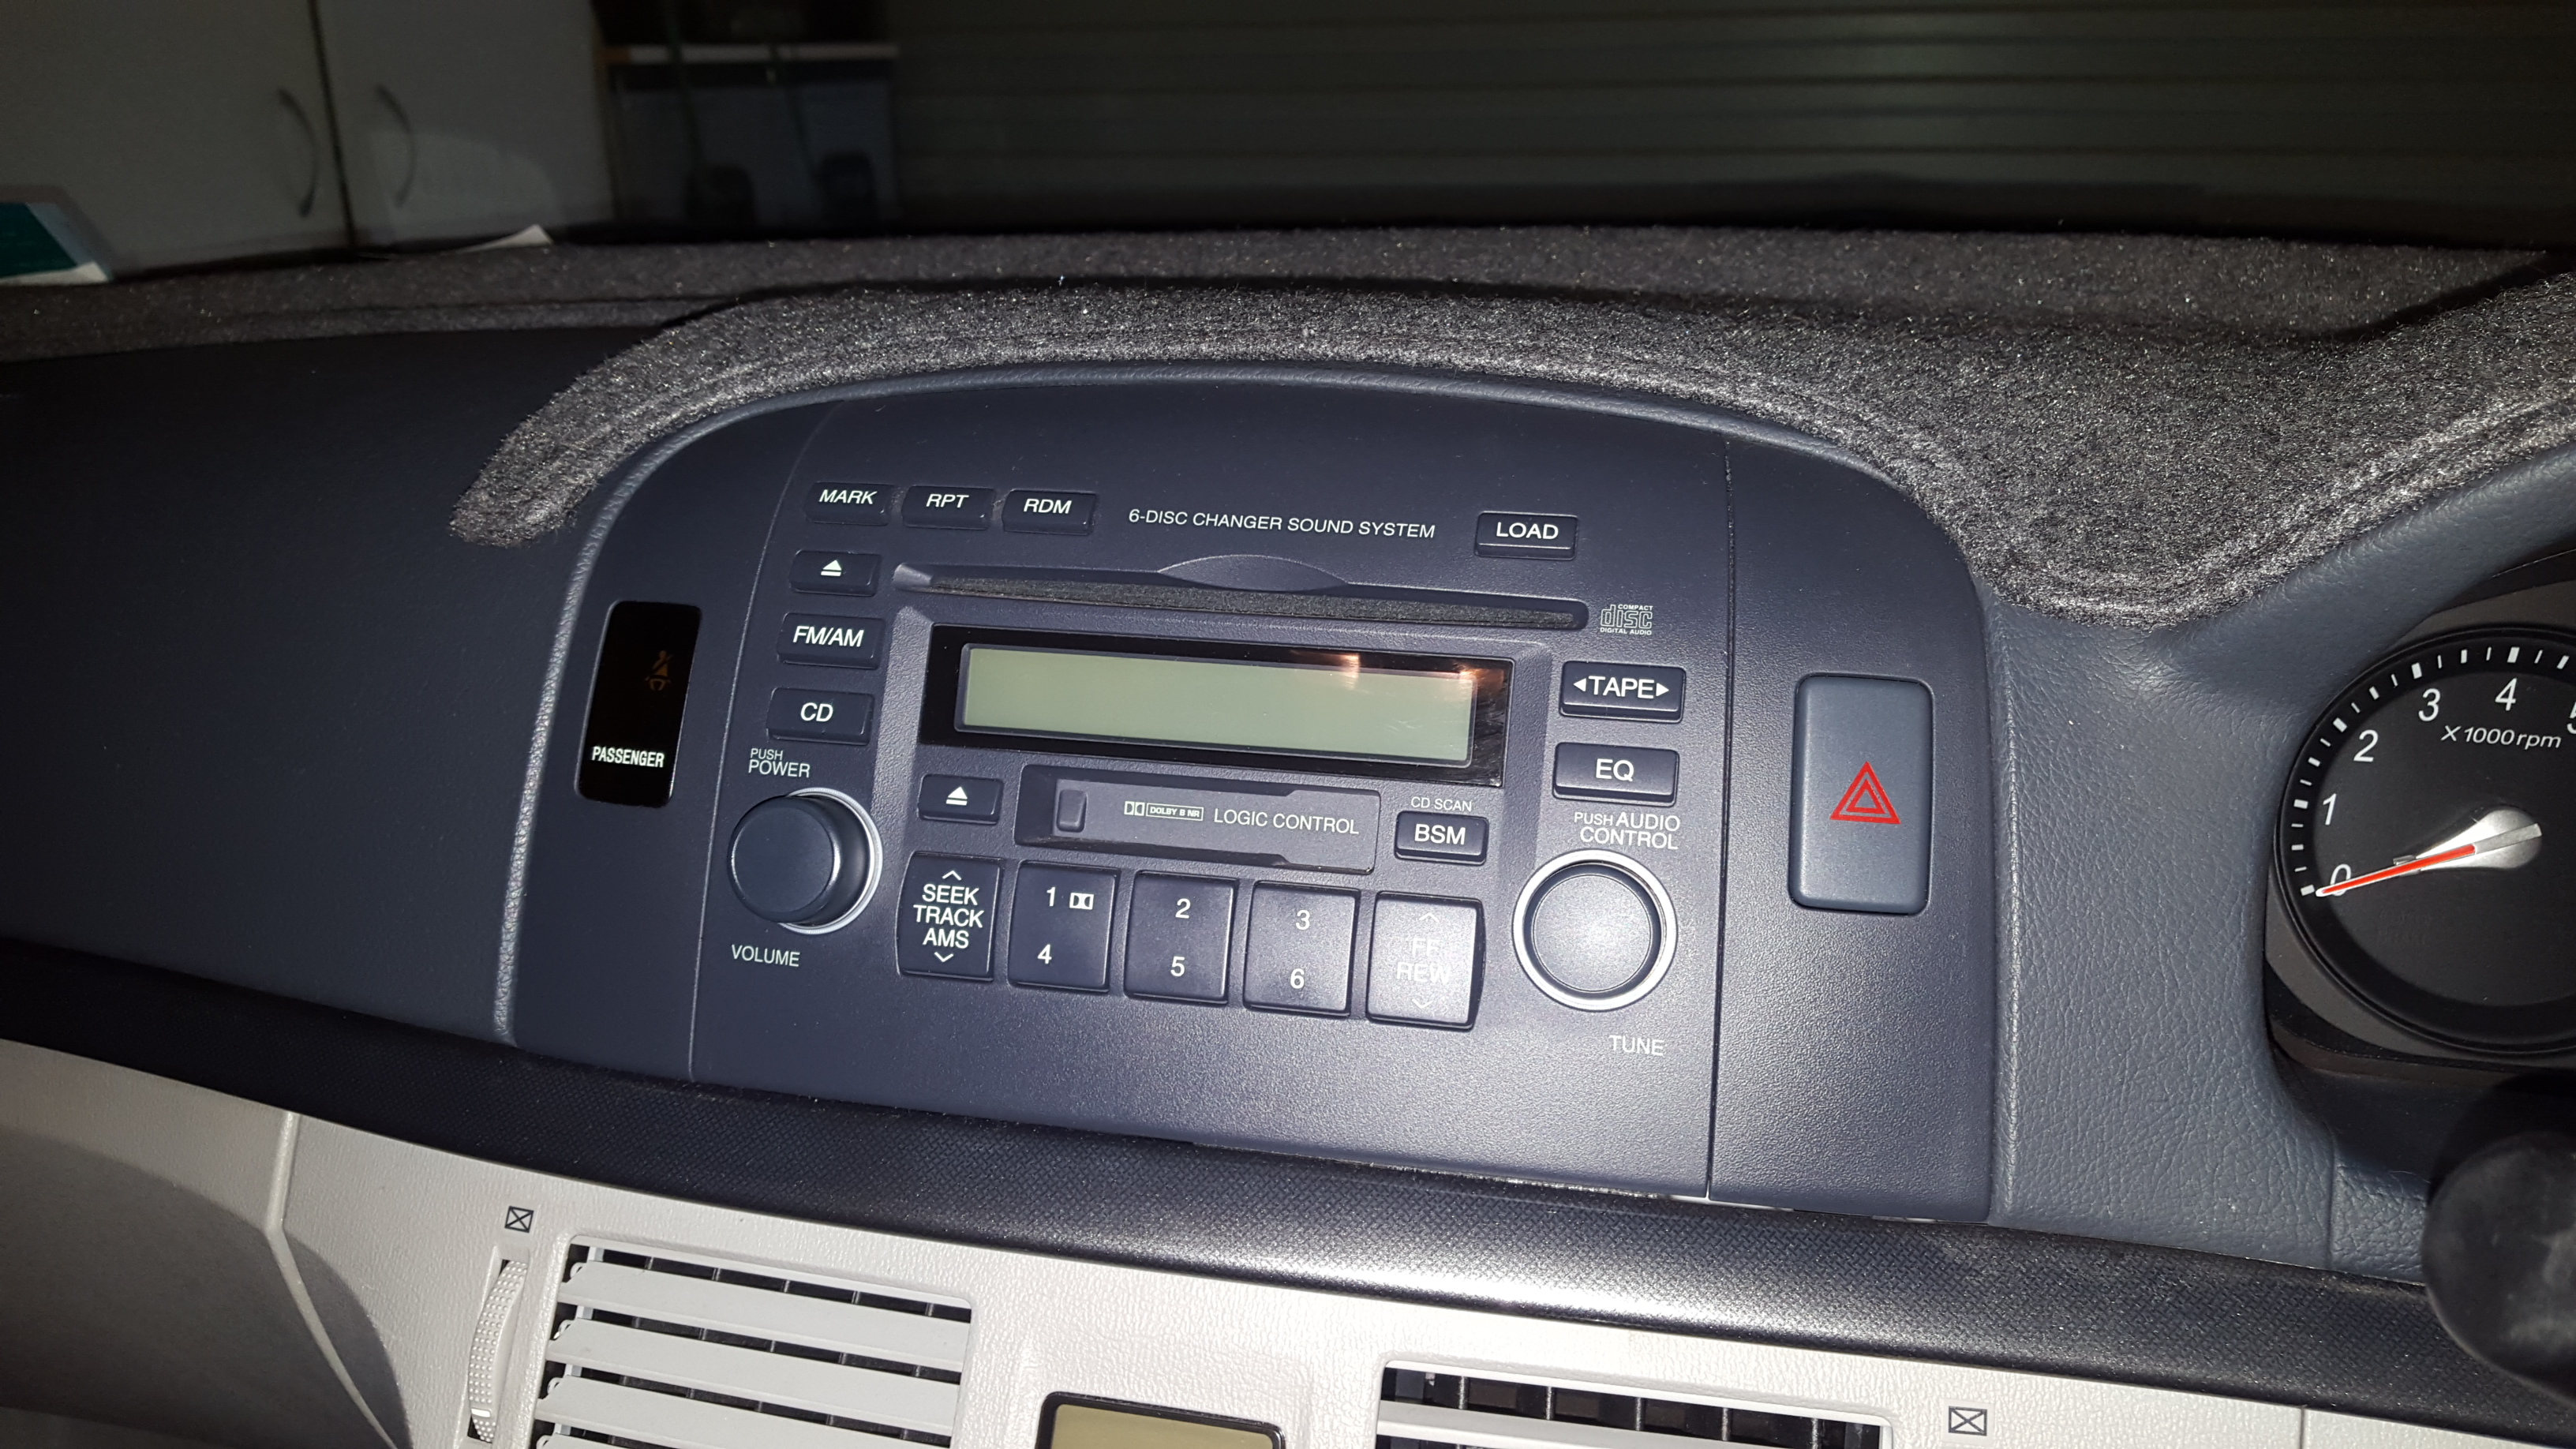
With the strip out of the way I was able to get at the screws holding the panels on either side of the head unit and could remove those panels. With this done, the screws on either side of the head unit were accessible, and I was able to get it removed.
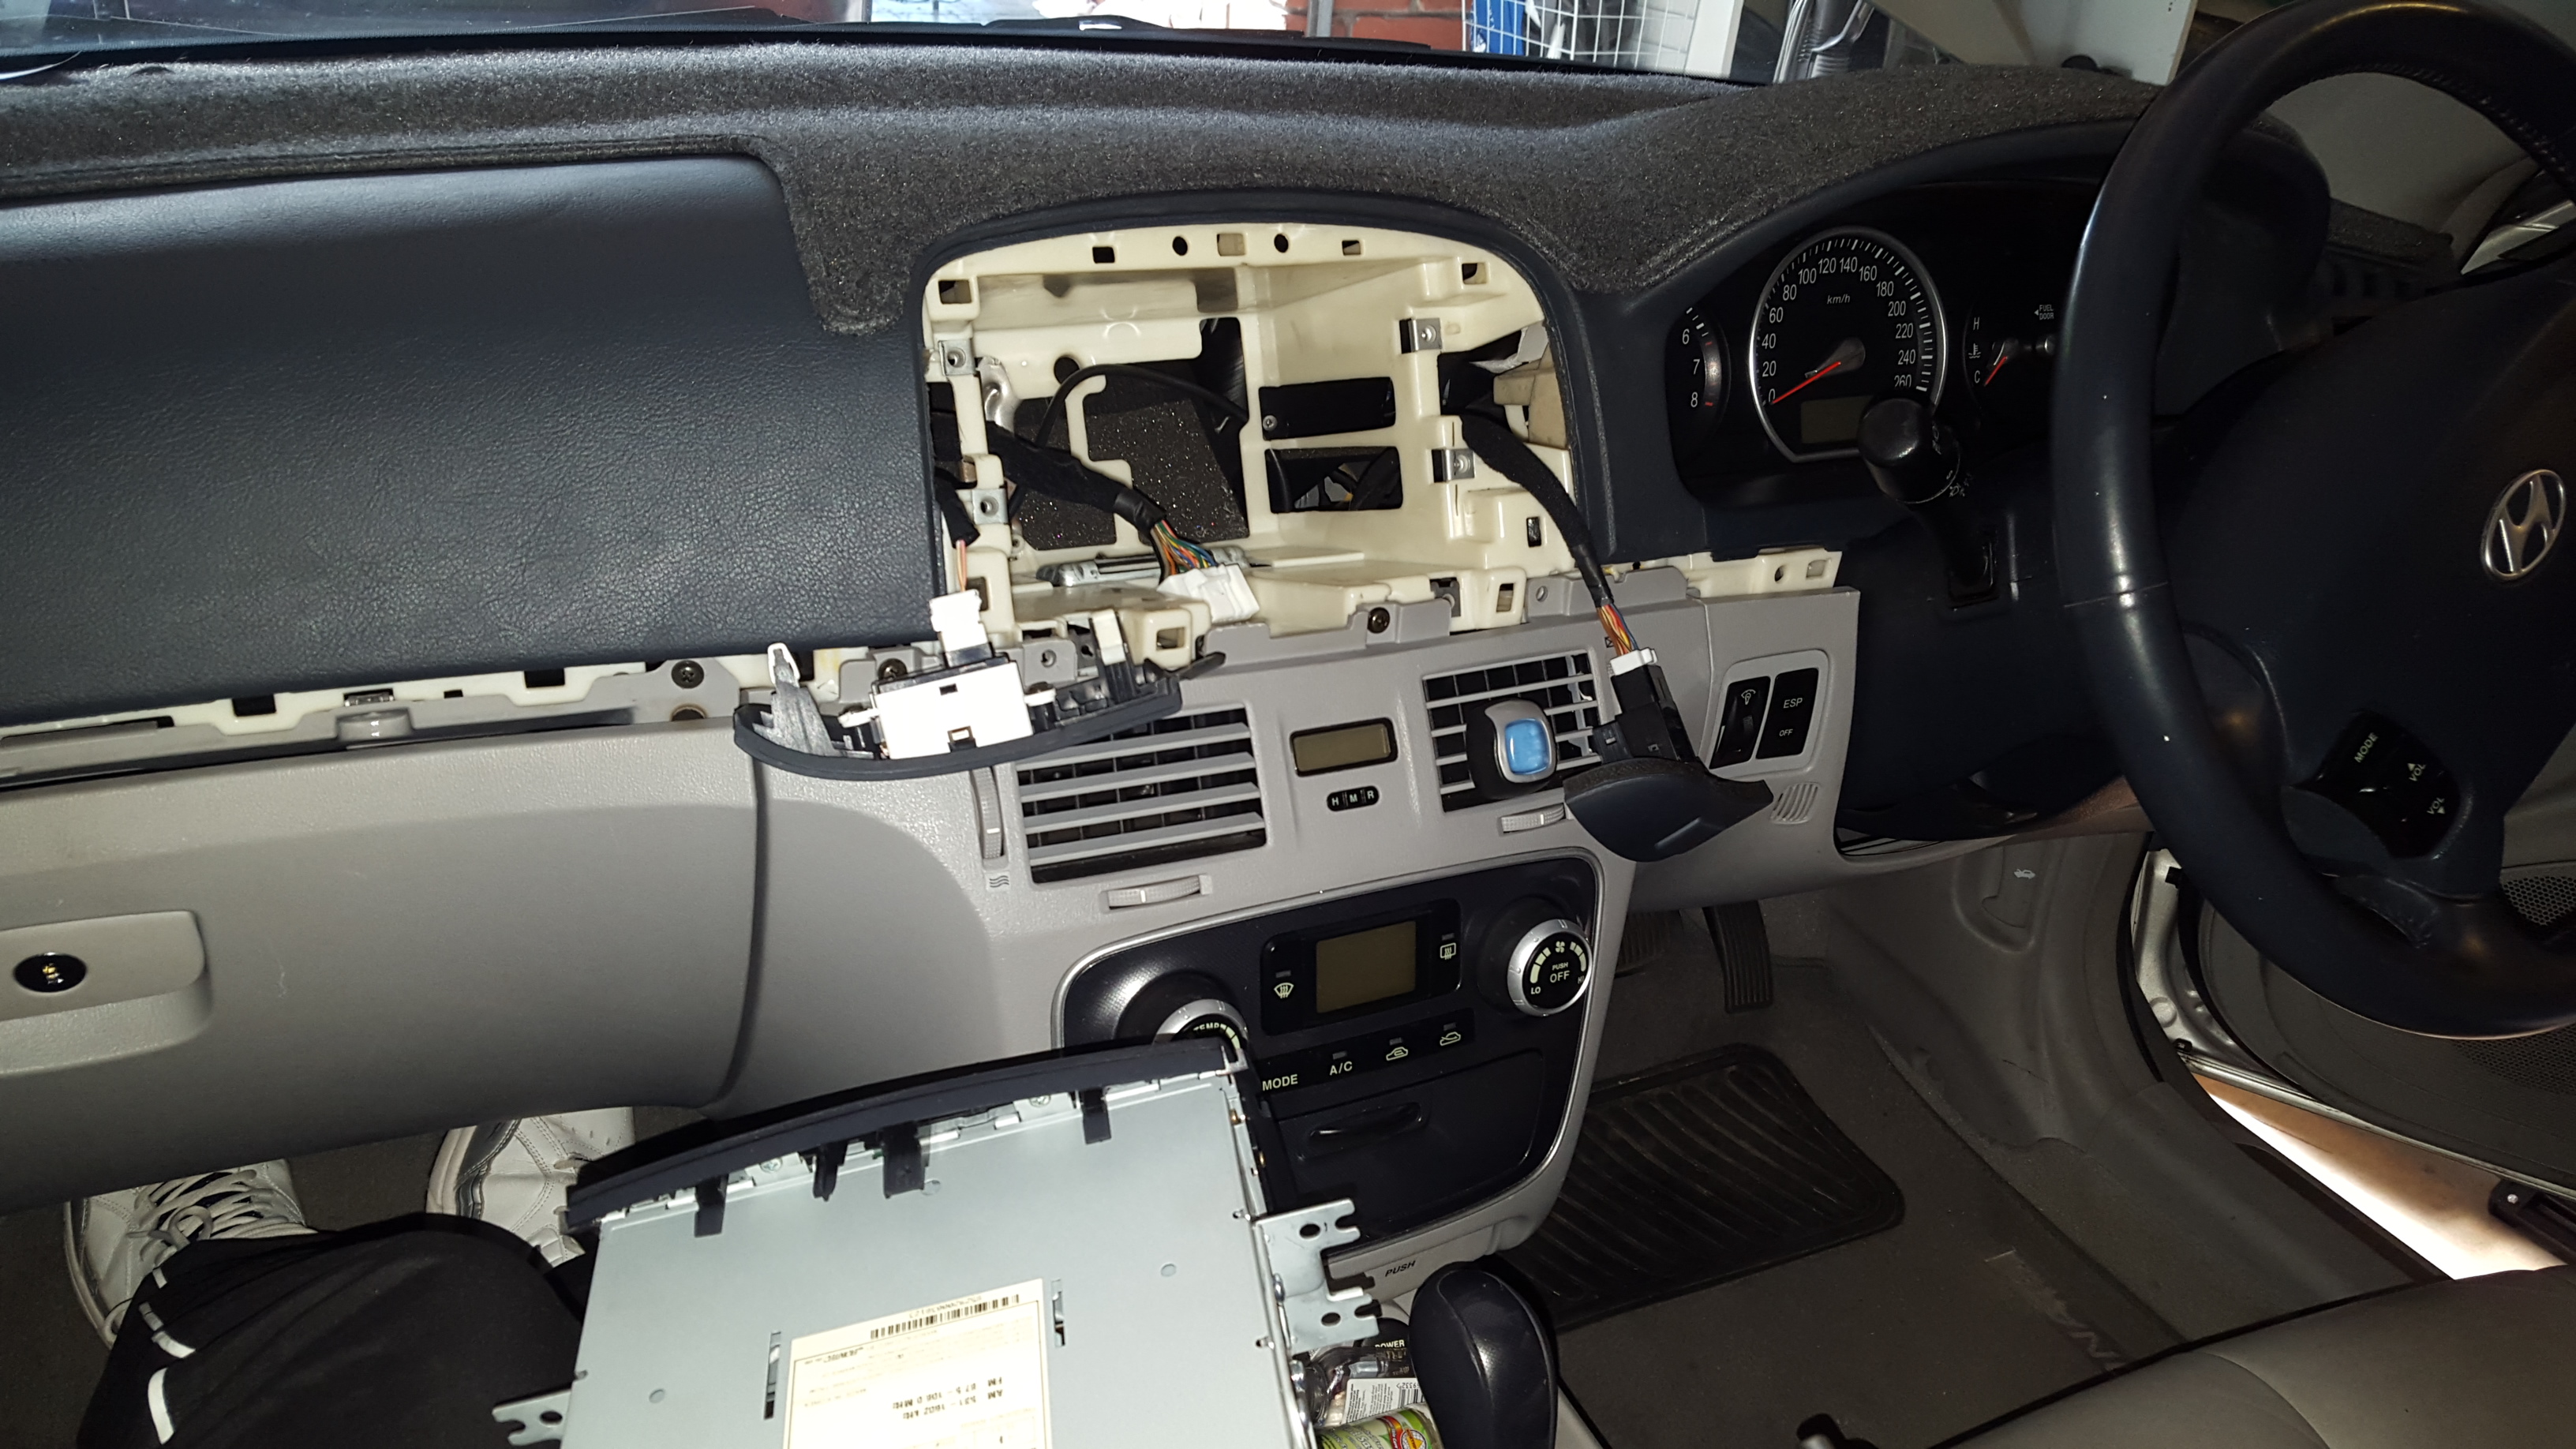
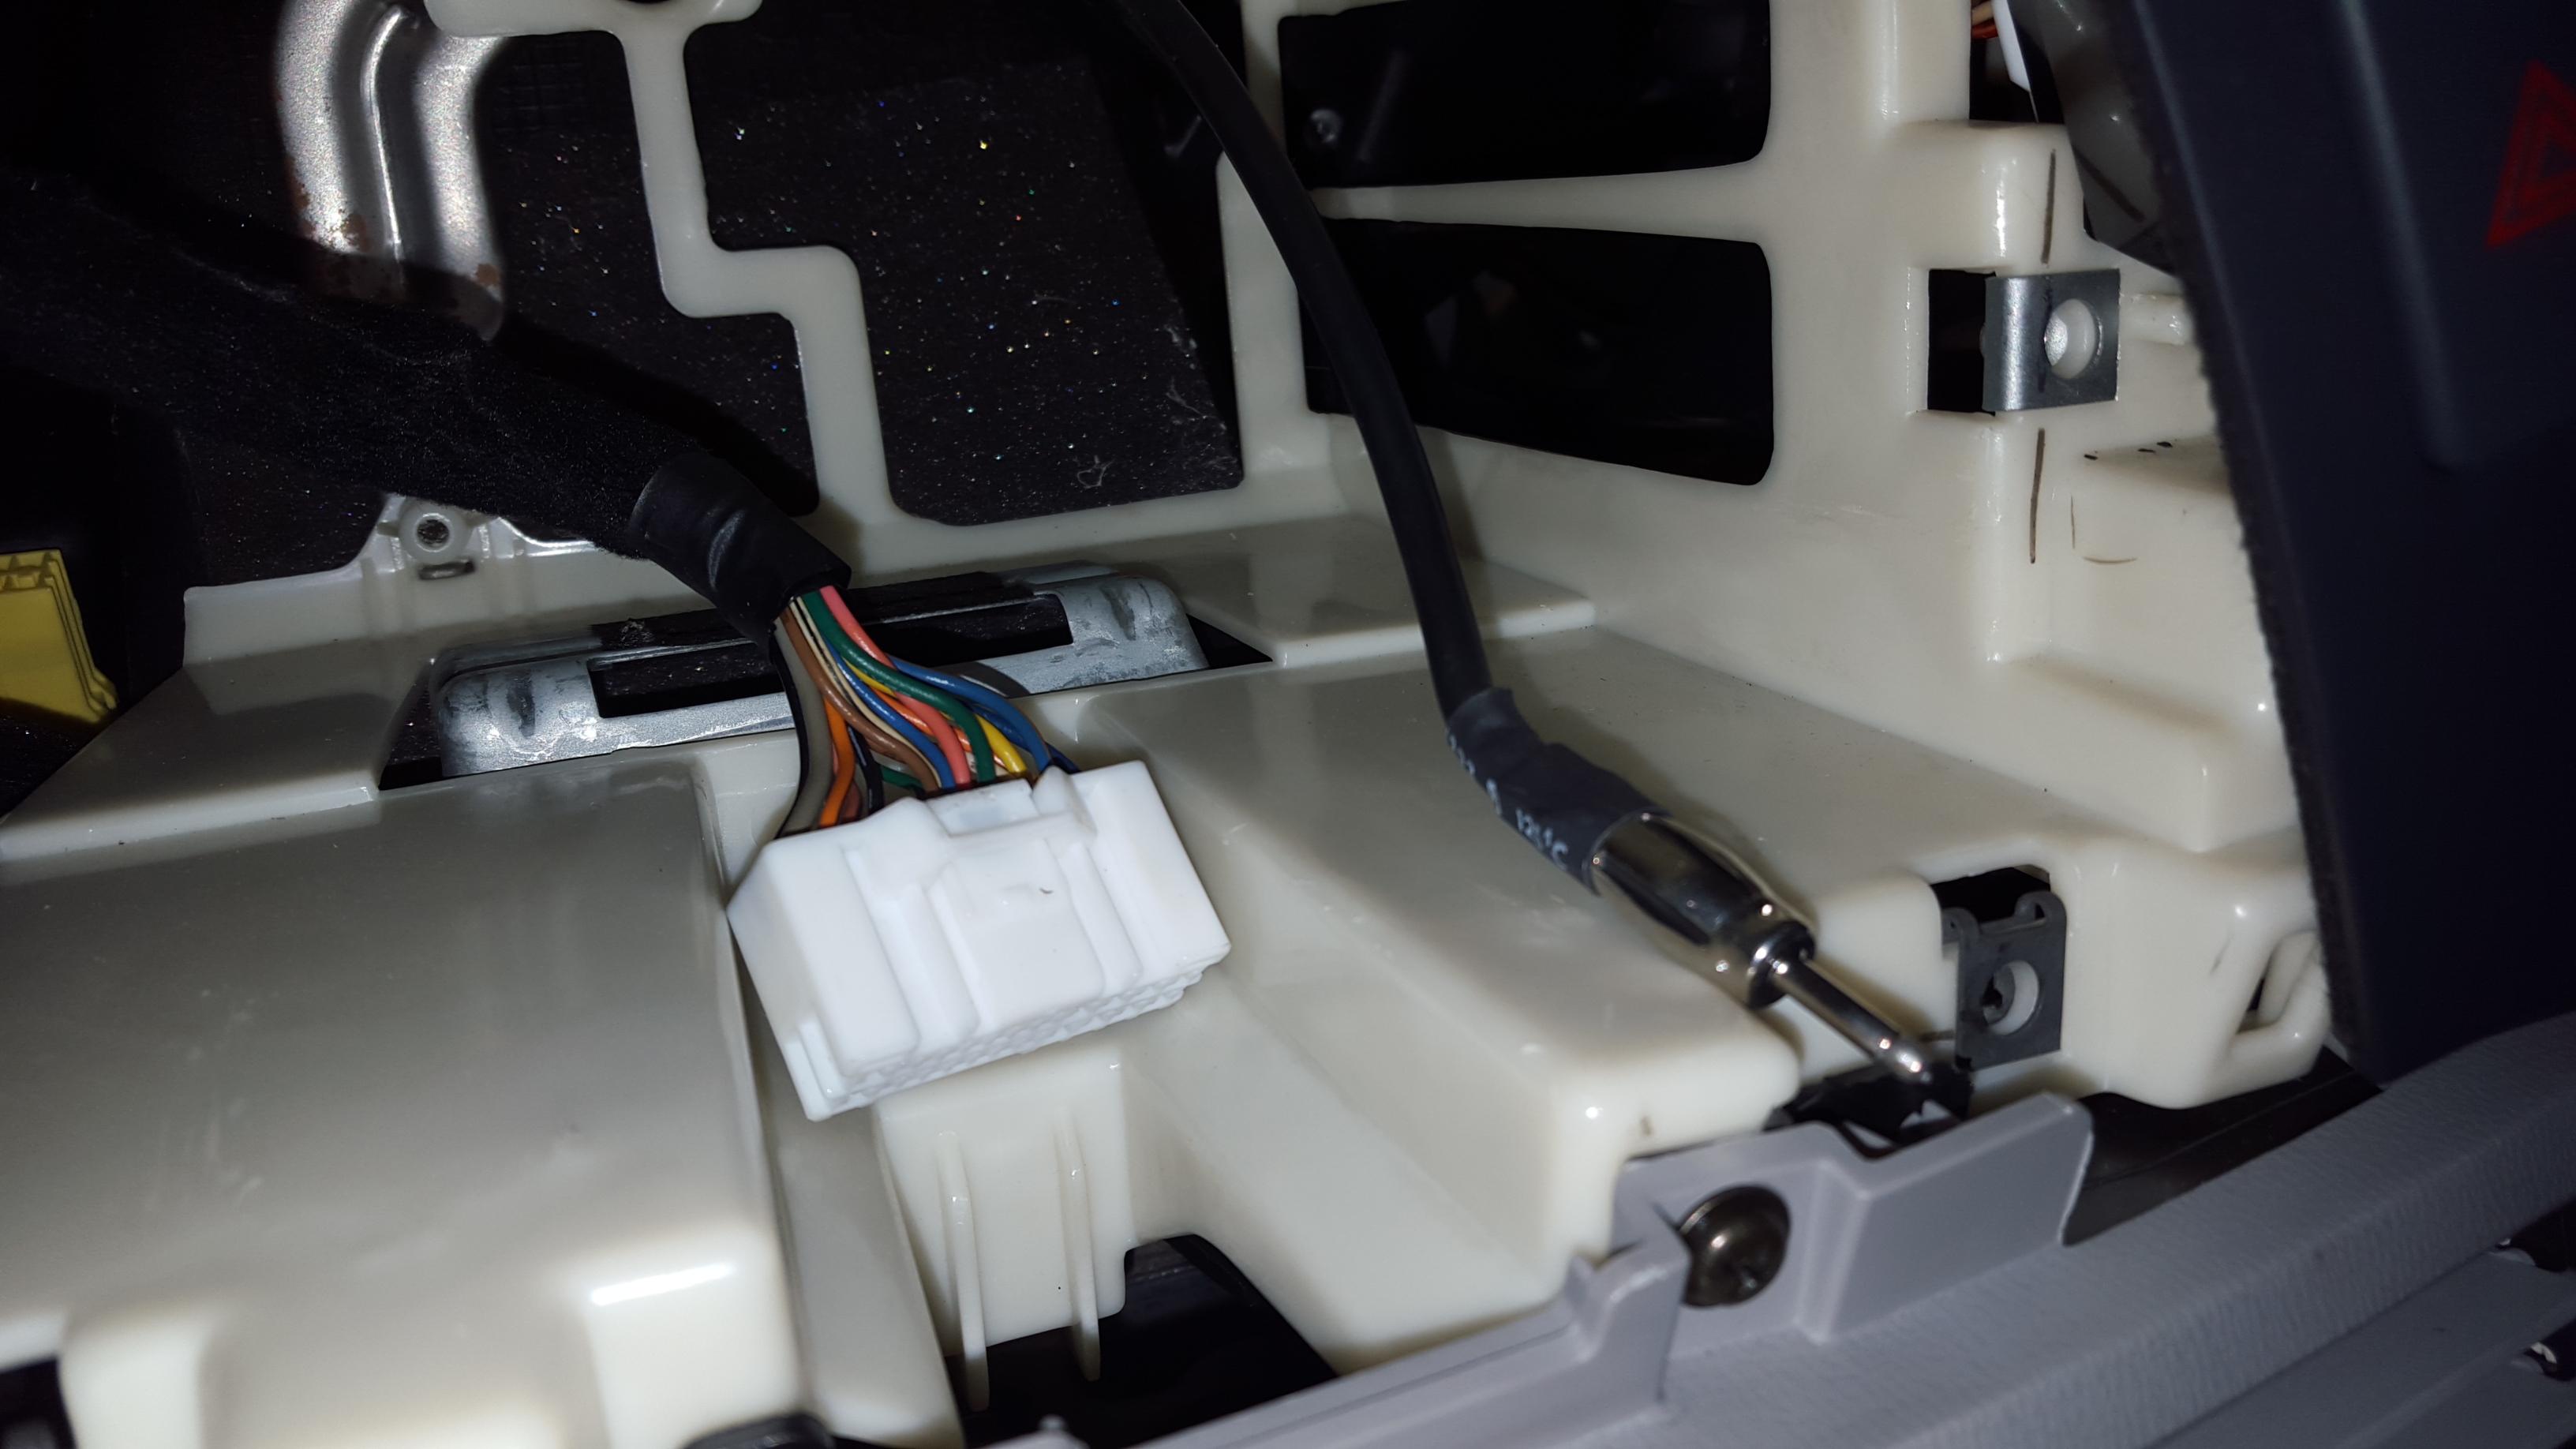
Now I had access to the cables, and found there were two – one for the antenna, and a wiring harness containing everything else.
I was also able to get a photo showing the specifications on the head unit.
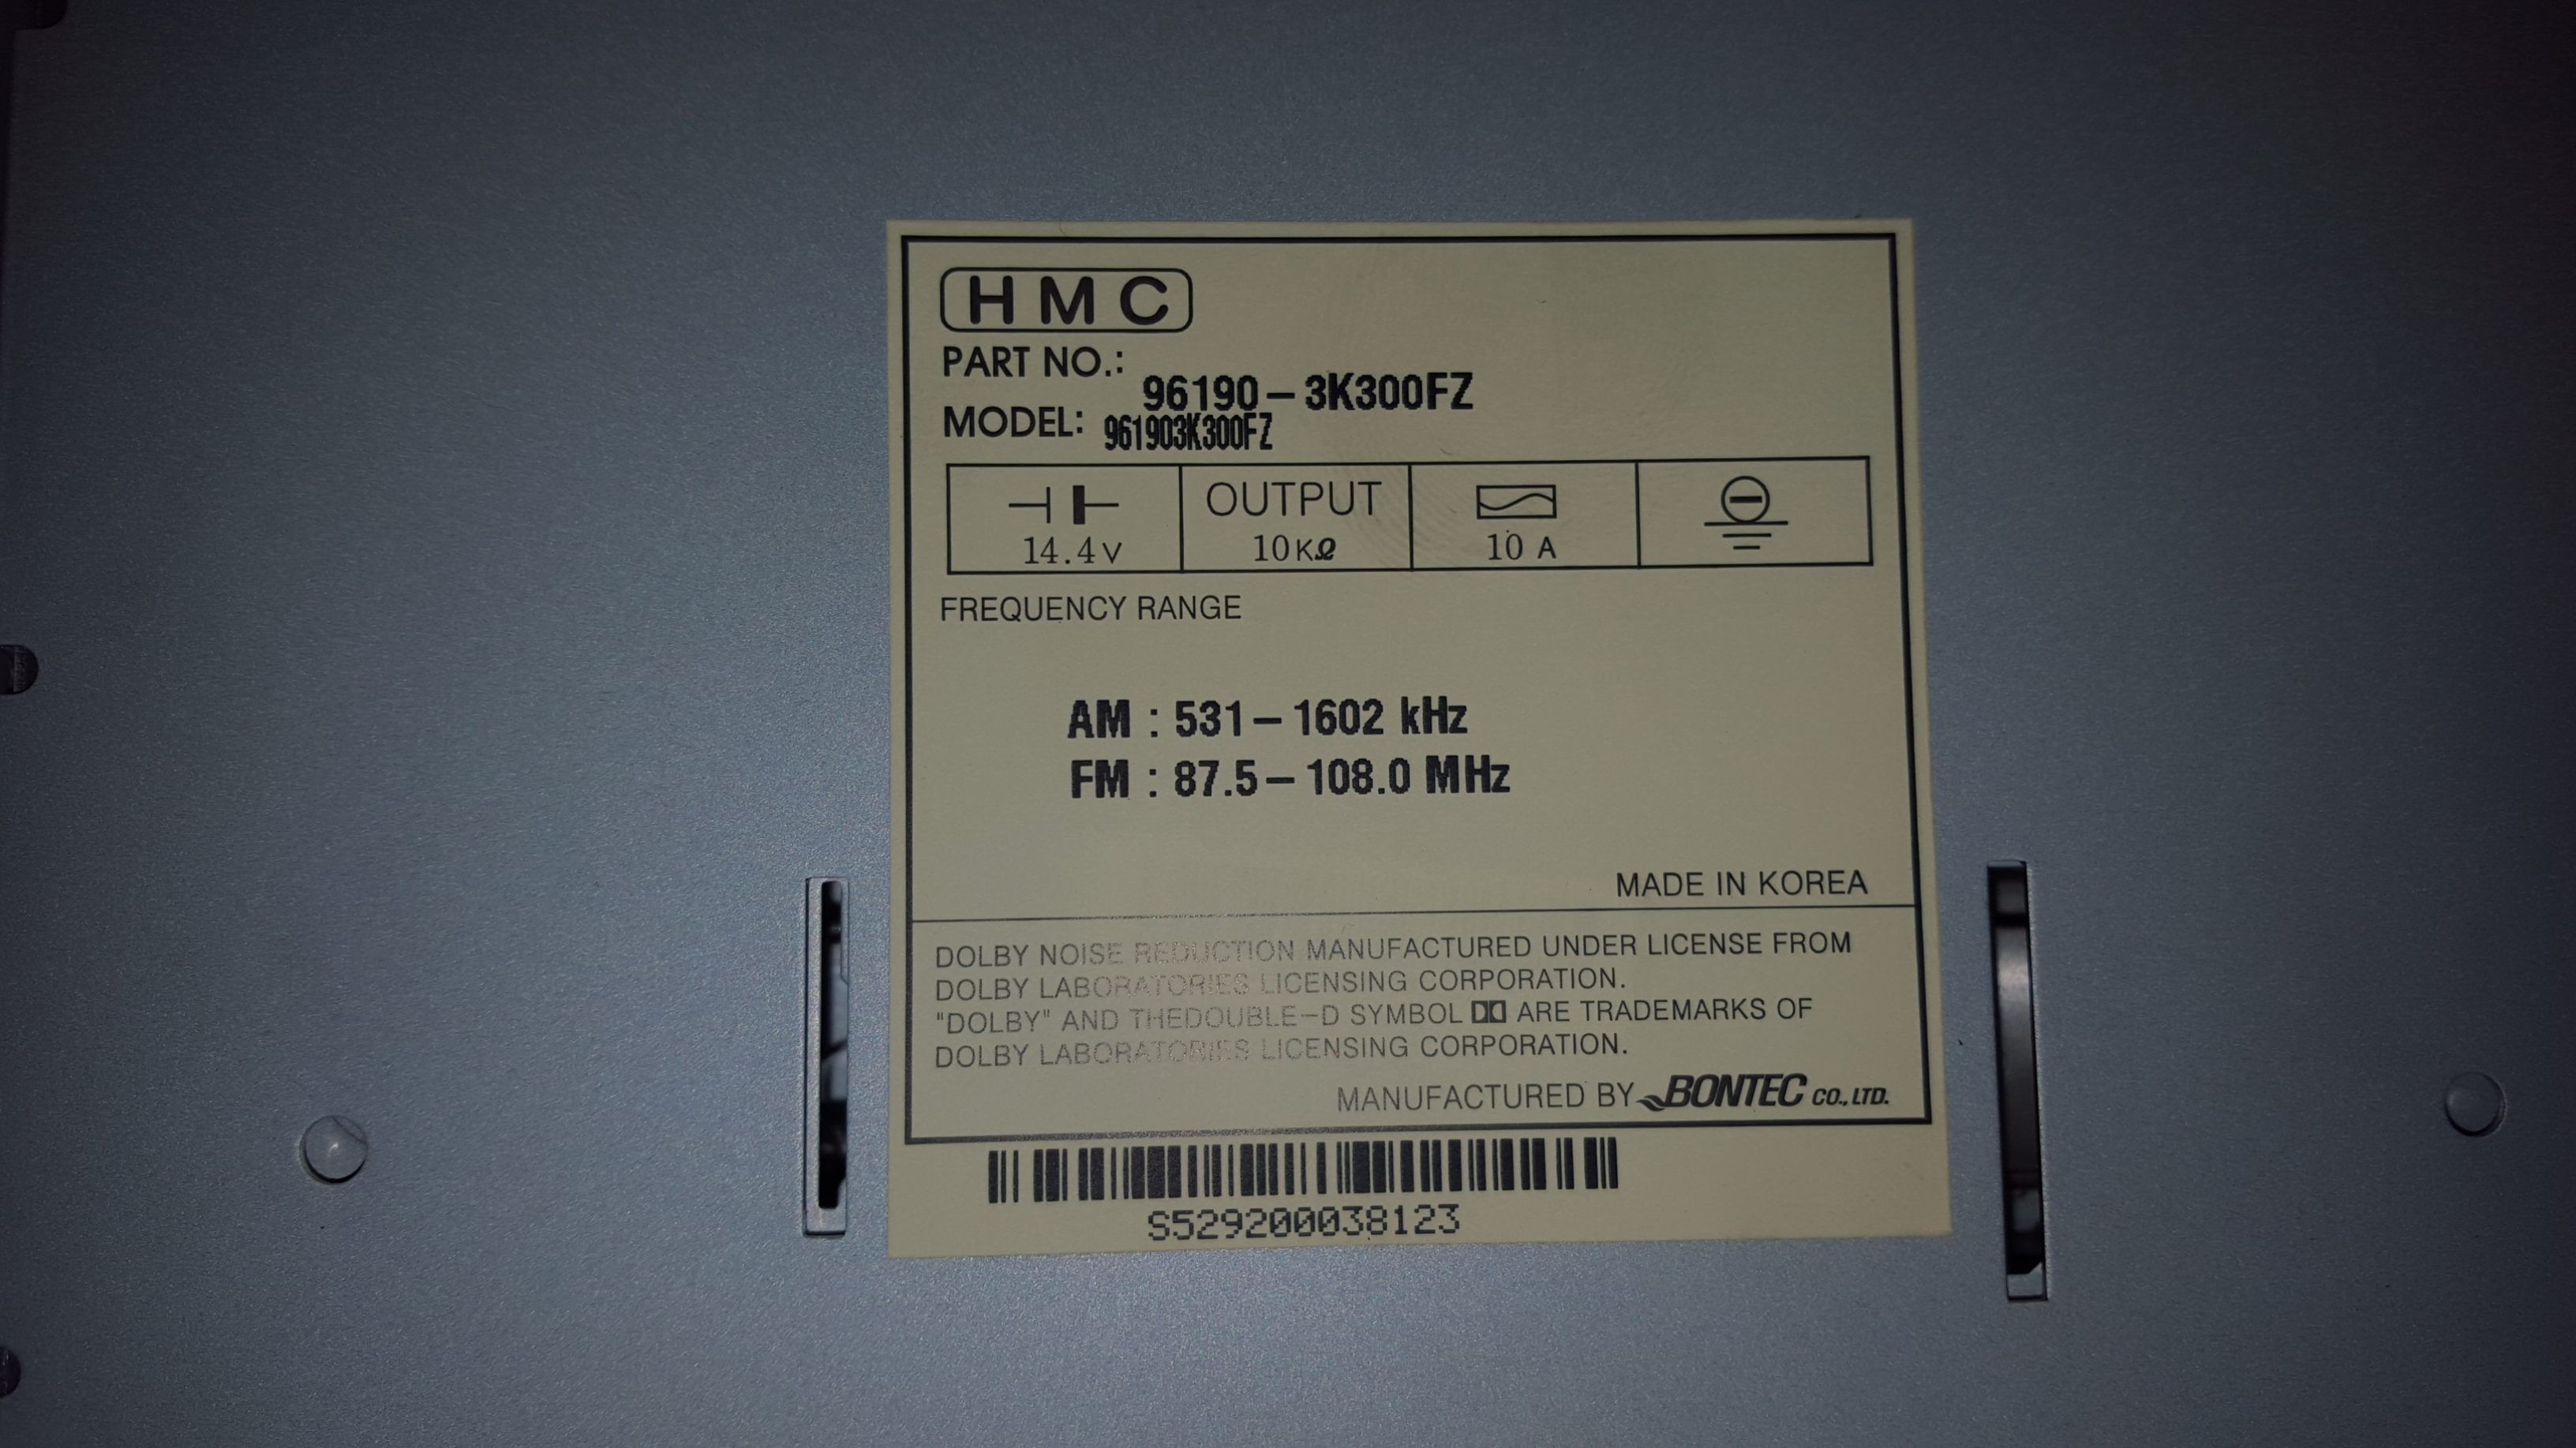
I sent these through, along with a few more images of the connectors, and the seller said they were able to match up the configuration and would ship the new head unit shortly. Perfect!
Unfortunately, there was going to be a wait of a few weeks before the new unit arrived. So, I reinstalled the old head unit, but left the garnish strip removed – the head unit was easy enough add or remove as it used screws, but the strip was clearly going to be a pain each time with those little clips I had in short supply.
Installation
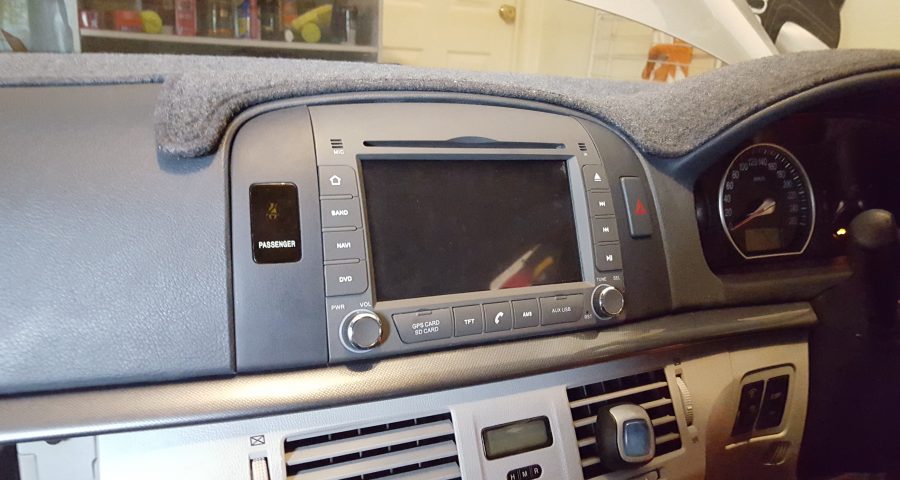
After a few weeks the new head unit arrived. I once again uninstalled the original unit, plugged the new one in, and bolted it in place. Things were looking good. With fingers crossed, I turned the key to the accessory position and waited.
The new head unit sprang to life. A logo popped up, and after 15-20s or so, I was presented with an Android homescreen. I started to flick through the various settings – things seemed to be working!
Installing Reversing Camera
This was a question that I’d been struggling with since I started planning this project. If I’m going to install a reversing camera, where is it going to go? I didn’t want to do anything that would damage my car, and wasn’t too keen on the idea of drilling holes in the rear bumper (or anywhere else, for that matter!). That pretty seriously limited my camera install options, though.
After thinking about it for a while, I realised that there was already a camera-sized hole in the rear of the vehicle: the keyhole for the boot! That said, it was already occupied by the keylock – a slight problem, to be sure. Thinking about it, I realised that I’d never actually used the key to unlock the boot – that’s what I had the keyfob for, or the button inside the car. So, I started investigating if the keylock mechanism was removable, and after a little poking and prodding, it turned out that it was. This left me with a nicely finished hole in the boot of the vehicle, just a little larger than the camera.
Now, to get the camera to fit. Looking at the hole I was left with, it seemed that some sort of sleeve to go around the camera and that would clip into the hole would do the trick. This wasn’t the sort of thing I could just pop down to the hardware store and get – luckily, nothing is impossible if you have a 3D printer!
(okay… most things are still impossible… but some things like this are possible!)
I modelled an adaptor to hold the camera in place. Then I printed it, and a short while later had the part in hand.
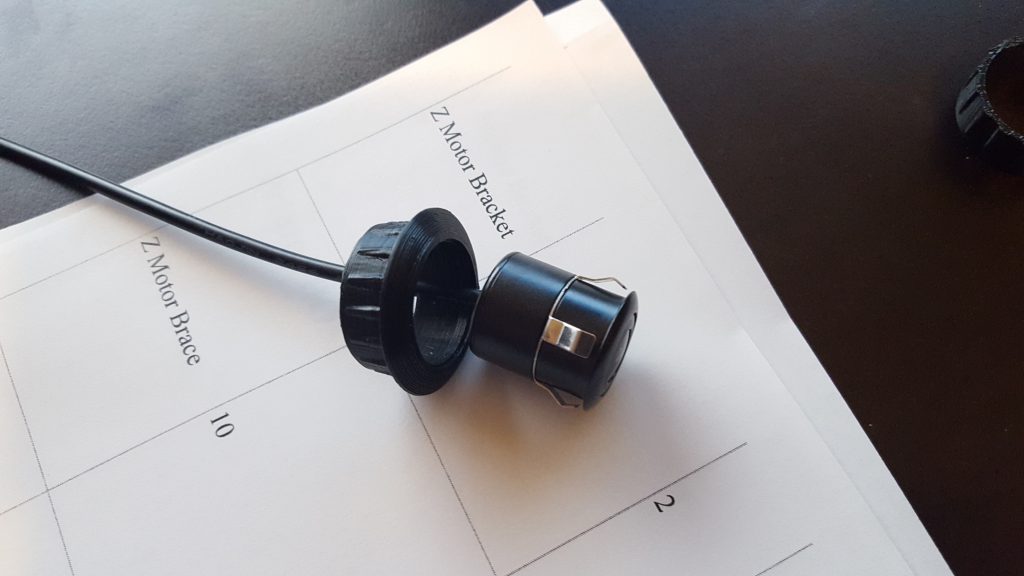
Pressing the camera into the adaptor, it fit snugly, and didn’t seem to want to come out again. I then pressed the whole assembly into the leftover keyhole, and it clicked into place nicely. Excellent! That camera didn’t want to come out, and if the adaptor hadn’t gone into the car nicely I suspect I would have been wrestling with it for a while trying to reclaim my camera. Fortunately, that was not required.
Now that I had the camera in place, there was the little issue of sorting out the wiring. I’d need to get cables from the new head unit in the dash all the way into the lid of the boot – which was quite a way. Looking at the inside of the car, it seemed like it would be possible to hide the wiring under the internal trim pieces below the passener side doors. I grabbed a few trim removal tools (plastic spades, really) that I’d picked up from a local automotive shop, and started testing this theory. The trim pieces pried up with a little effort, and I was able to bury a length of the wire as planned. Good!
So, that was the easy part – the part I was worried about was getting those cables into the lid of the boot, in a way that was neat and tidy and not hugely obvious. This seemed like it could be a challenge.
Tidying Things Up
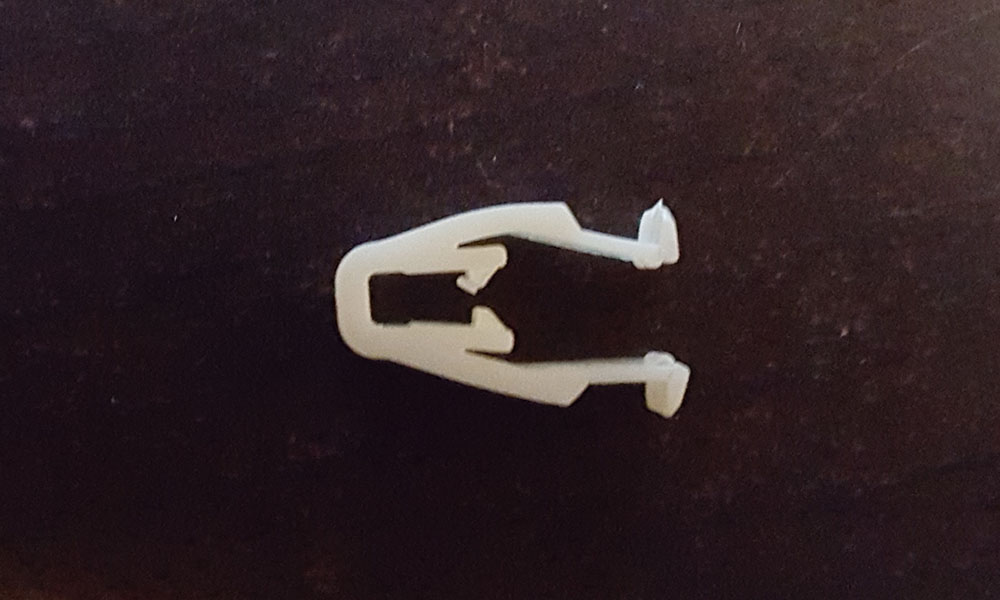
Now it’s time to reinstall the trim strip! One problem – as I mentioned earlier, a few of the clips that were holding it in place fell back inside the dash when I first removed the strip. I did some poking around, but couldn’t find any of them within the car – and I was missing two. The strip could still be reinstalled with two of the clips missing, but it annoyed me that it wouldn’t be done properly – and I thought perhaps the trim might not sit perfectly flat without all of the clips.
My first thought was that I could probably order replacements. It took me a little while to figure out what these particular clips were called, but eventually I found a website selling spare parts for Hyundai vehicles that had what looked to be these clips available. However, there were a few drawbacks to going with this option:
- They weren’t really cheap, especially not for what was just a little piece of plastic
- Shipping costs were going to add to that
- I’d be waiting at least a week for the replacement parts to arrive
I started to wonder if there was a better way to go about this. Thinking about it, the clips were nothing special – just small pieces of plastic – and again, I have a 3D printer at my disposal. A plan begins to form!
Before I could print any replacement clips, I’d need a 3D model. I traced out one of the existing clamps, and recorded a few key measurements. Then it was time to fire up SolidWorks and get to designing!
Luckily, the clips were a fairly simple shape – it’s an odd shape, but mostly it’s just a extruded 2D shape, so there wasn’t a lot to drawing it up. After a little while of comparing back and forth with the measurements and the clip I had on hand, I was happy with my model.
I set one to print straight away. Being such a small part it didn’t even take ten minutes to print – it almost took longer for the printer to warm up than the time it took to actually print the part. After giving it a few minutes to cool down, I grabbed the part and went to try it on the car’s dash.
I tried to press the clip into place on the back of the trim strip. It wouldn’t quite go on – I felt like it would if I really forced it, but I didn’t think that was necessary with the original clip. I grabbed an original I had spare and tried it – that went on with much less force. So, my replacement clip isn’t an exact fit – I set the two parts, the original and my replacement out, side by side – and it became clear that the replacement was just a fraction bulkier than the original.
It was only a very small difference, but it was there. The difference was small enough that it could have been attributed either to error in the design, or simply tolerances in the printing process. Either way, this is probably what was causing my problems.
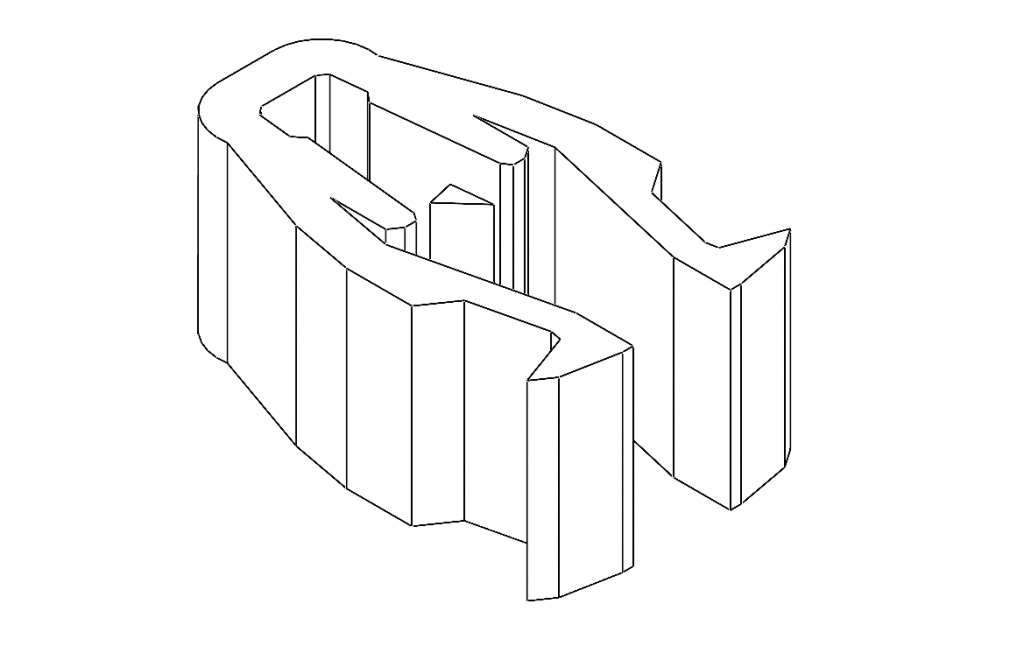
I went back to the design, shrunk the outer perimeter just a fraction, and printed off a new clip. Ten minutes later I was testing it out, and – it was a perfect fit. Excellent!
Happy that this had worked, I threw the clip design up on Thingiverse – so now if anyone else is in the same position, they can save some time and just download a replacement clip (people with 3D printers dismantling the dash of their Hyundai’s and losing the included clips then subsequently looking online for replacement models is probably not a big pool of people, but you never know…).
I printed off a couple more of the clips, and was then able to get the dash reassembled.
Getting Internet Access
The head unit needs internet access – for the Google Maps navigation, any music streaming, and so on – so I needed a way to set that up. One option was to buy a 3G/4G USB modem and connect it to the unit – but I decided against that, as I didn’t want to have to grab another SIM card and mobile plan just for the car. There had to be a better option than that.
The most obvious solution, then, was just to tether the head unit to my mobile phone’s internet, via WiFi. I set up a mobile hotspot on my phone, and then configure the head unit to connect to it – easy. However, that’s not a perfect solution – I couldn’t leave my phone’s hotspot on all the time without losing the ability to connect to WiFi as usual, so I’d always have to make sure to enable the hotspot when driving, which would be a bit of a pain.
What I wanted was some way to automatically enable my phone’s hotspot mode when I was in the car. My first thought was that I could put an NFC tag somewhere in the car, where my phone could sit – then I could configure my phone via Tasker to enable the hotspot when that tag was present. However, that would still require me to put my phone in a specific spot whenever I wanted the internet to work, which was not ideal. Then, I realised that there’s another sign my phone could pick up on – if it’s connected to the head unit via Bluetooth! At this point, I wondered if it was possible to share the internet connection via Bluetooth and just save the hassle of using WiFi altogether. It seems like my phone had the option, but the version of Android on the head unit did not – bugger. So, I set up a quick Tasker rule that would enable the WiFi hotspot whenever the phone is connected to the head unit via Bluetooth, and turn off the hotspot when the Bluetooth is disconnected.

I tested the Tasker configuration a few times by turning the head unit on and off – and it seemed to work perfectly! After a few days of running with this setup, it’s working well – whenever I start the car, the head unit has internet access – I just have to make sure that Bluetooth is turned on. This means that navigation via Google Maps works great, and that was one of my initial goals.
Conclusion
So, now I have a new-and-improved head unit with GPS navigation, Bluetooth for handsfree and music, extendable by any Android apps I want to install, and with an integrated reversing camera – plus, it still works as a radio. Excellent! This is a great improvement over what I had, and I’d achieved everything that I’d wanted in the upgrade.
For anyone looking to do something similar, I’d recommend they give it a go. However, I’d suggest removing the current head unit first, and thoroughly investigating the connectors that it uses. I’d also suggest getting in touch with the seller and asking for an image showing the wiring pinout of their head unit – having this information from the beginning would have saved me a bit of time, and is something I would aim to do beforehand in future.
Here ends this adventure.
Leave a Reply